
 This post may contain affiliate links which won’t change your price but will share some commission.
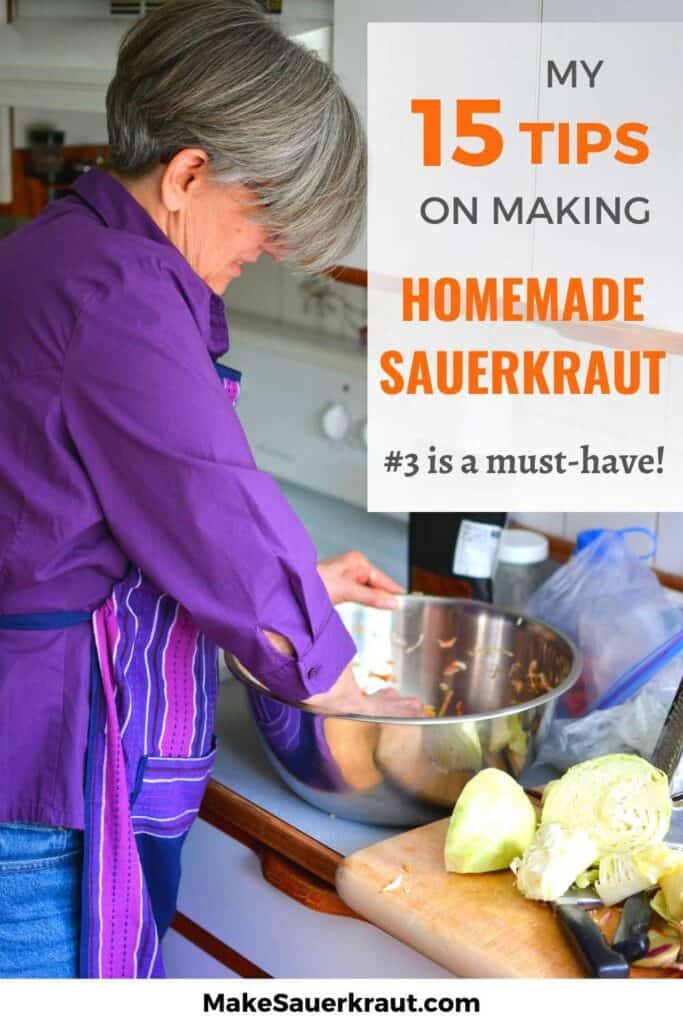

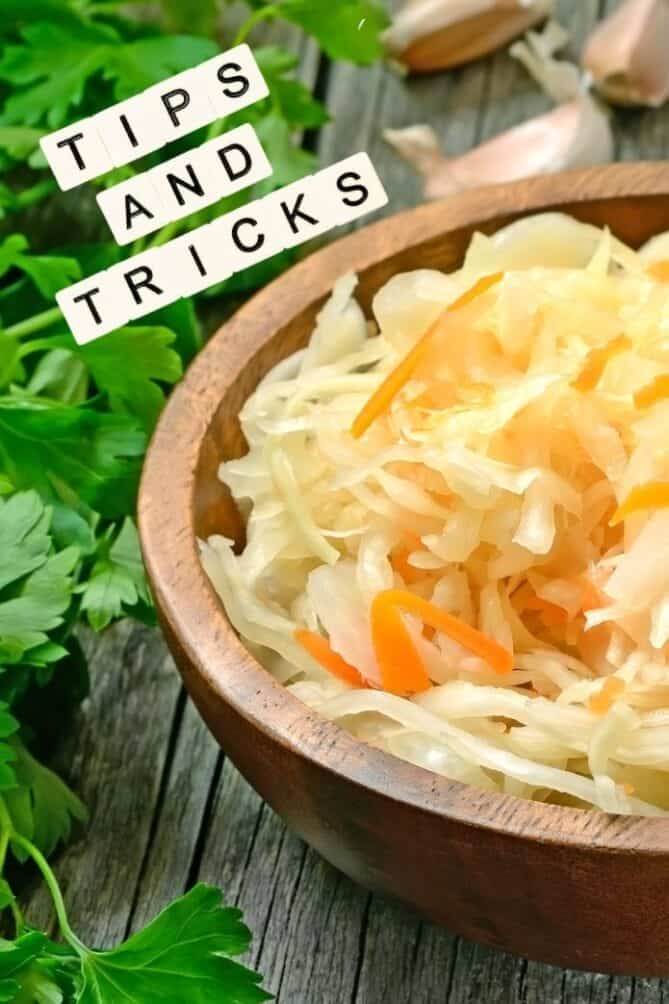
It can be frustrating to put time, effort, and money into fermenting a batch of sauerkraut only to have it turn to mush, taste way too salty, or even grow a layer of mold. Take advantage of what I’ve learned during my twenty-plus years of fermenting with this collection of tips that will set you up for stellar success.

These tips, from selecting the highest-quality ingredients to mastering the fermentation environment, will help you produce consistently successful batches.
A quick reality check, however…
Fermentation is not an exact science – no matter how hard I try to make it so.
We are at the mercy of the bacteria that do the fermentation work for us.
Provide the best working conditions for them but allow the occasional off-batch to be a humbling experience.
Now, read below to find a fermentation tip or two you can put to use for your next batch of sauerkraut.
- 1. Trust In Our Microbial Universe
- 2. Use the Best Quality Ingredients You Can Afford or Have Access To for Out-of-this-World Flavors
- 3. Invest in a Digital Scale for Peace of Mind
- 4. Gently Clean Your Fermentation Equipment
- 5. Use a Mineral-Rich Salt to Provide Additional Nutrients for the Bacteria
- 6. Weigh Your Salt to Ensure Fermentation Success
- 7. Keep Your Ferment Below the Brine to Prevent Molds and Bacteria from Taking Hold
- 8. Use a Lid with an Airlock (or Crock with a Water-Sealed Lid) to Keep Your Ferment Anaerobic
- 9. Ferment within the Ideal Temperature Range for Happy Bacteria
- 10. Graduate to a Water-Sealed Fermentation Crock to Raise the Bar on Your Ferments
- 11. Test the pH of Your Ferment to Reduce Anxiety
- 12. Be Curious, Ask Questions, Read Books
- 13. Label Your Ferments & Make Notes
- 14. Ferment Seasonally for Top-Notch Flavors
- 15. Regularly Frequent Local Farmer’s Market for Fresh-Picked Produce
1. Trust In Our Microbial Universe
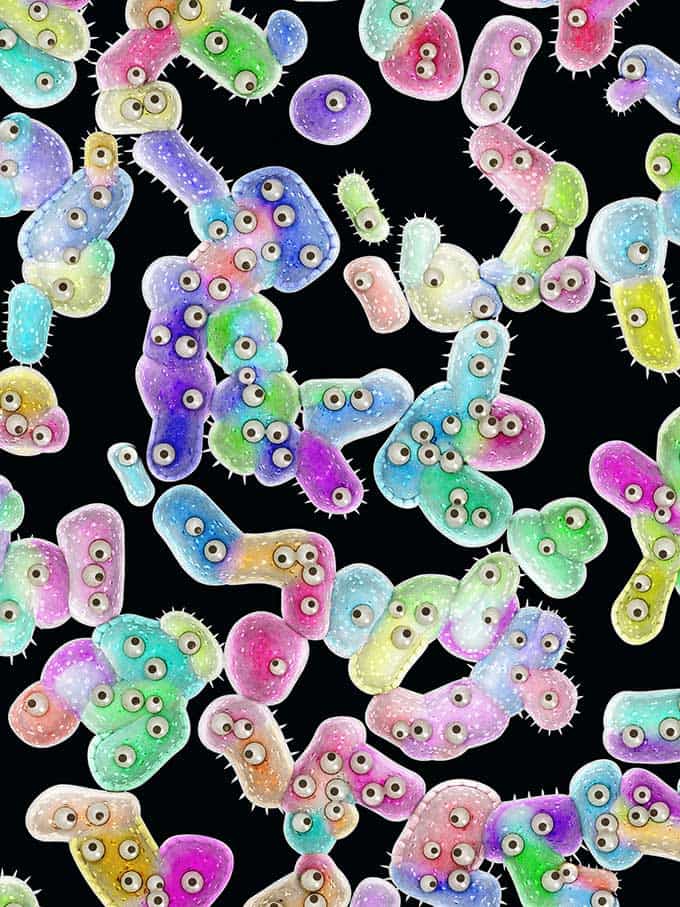
Don’t those microscopic beings look rather cute and harmless?
Our vegetables – and many fruits – come with everything they need for fermentation to happen. Pause and ponder this for a moment.
Bacteria are everywhere: on your hands, in the air, on your cutting board, and in your jars.
But, instead of embracing and trusting in the wonder of these microscopic creatures, we dive-bomb them with hand sanitizers and toxic cleaning products. We kill off both the good and the bad when we take a round of antibiotics for the slightest sniffle. And we live in fear of these microscopic beings.
Welcoming the world of fermentation into your home is your first small step into accepting these little creatures into your life. Gradually, you come to realize just how important they are.
There is no need to buy a nice little package of starter bacteria. Enough bacteria – and the right bacteria – already exist on the cabbage and vegetables you’re fermenting.
You do not need to add an extra step to fermentation by dripping a tub of yogurt to obtain whey, a “starter” often recommended.
It takes just cabbage, salt, and time to ferment something fabulous and develop a deep sense of awe for our microscopic friends.
2. Use the Best Quality Ingredients You Can Afford or Have Access To for Out-of-this-World Flavors

There is a noticeable difference in the fermentation action between a freshly picked head of cabbage purchased at your local Farmer’s Market—or from your own garden—and a head of cabbage bought at your local supermarket that was picked many months ago and shipped a great distance.
Aim for organic as much as possible. Organic produce is richer in nutrients, which means more food for our microbial friends. We truly are growing life in a jar. Feed them well.
If organic cabbage is not accessible or affordable, here are a few things to remember.
One is that cabbage is near the top of the Environmental Working Group’s annual list of “Clean 15” or “produce least likely to contain pesticide residue.”
Two, there is tremendous power in our microbial world. New science is finding that bacteria make fermentation happen and can significantly reduce pesticide residues in food.
This study looked at the role of microorganisms in the degradation of insecticides during the fermentation of Kimchi. At the onset of fermentation, the Kimchi was inoculated with the insecticide chlorpyrifos (CP). The CP degraded rapidly until day 3 (83.3%) and degraded completely by day 9. [A good reason not to stop fermentation too soon.]
Four different lactic-acid producing bacteria strains (Leuconostoc mesenteroides, Lactobacillus brevis, Lactobacillus plantarum and Lactobacillus sakei) were identified as the responsible BactereiaBusters.
Learn more about how to choose top-quality cabbage for making sauerkraut.
3. Invest in a Digital Scale for Peace of Mind
A digital scale is a must-have fermentation tool!!! If you have not yet purchased one, now’s the time to do so. Here’s a review of my favorite scale.
A digital scale allows you to effortlessly:
Set your salinity at the proper level. The success of your sauerkraut fermentation depends upon using the correct amount of salt for the cabbage and vegetables you want to ferment. The right amount of salt ensures that the lactobacilli, responsible for safely preserving your ferment, have a chance to do their job fully.
Fearlessly ferment. Weighing your ingredients and salt gives you peace of mind. You know your salinity is correct. Then, you’re left to note room temperatures and adjust fermentation length based on that.
Easily adjust a recipe to batch size. Do you want to ferment in a larger vessel or stoneware crock?
Make a few calculations based on previous batches, and then prepare the proper amount of vegetables and sliced cabbage to fit into your new fermentation jar or crock. Multiply the number of grams weighed by your salt percent. Add the proper amount of salt in grams. Done!
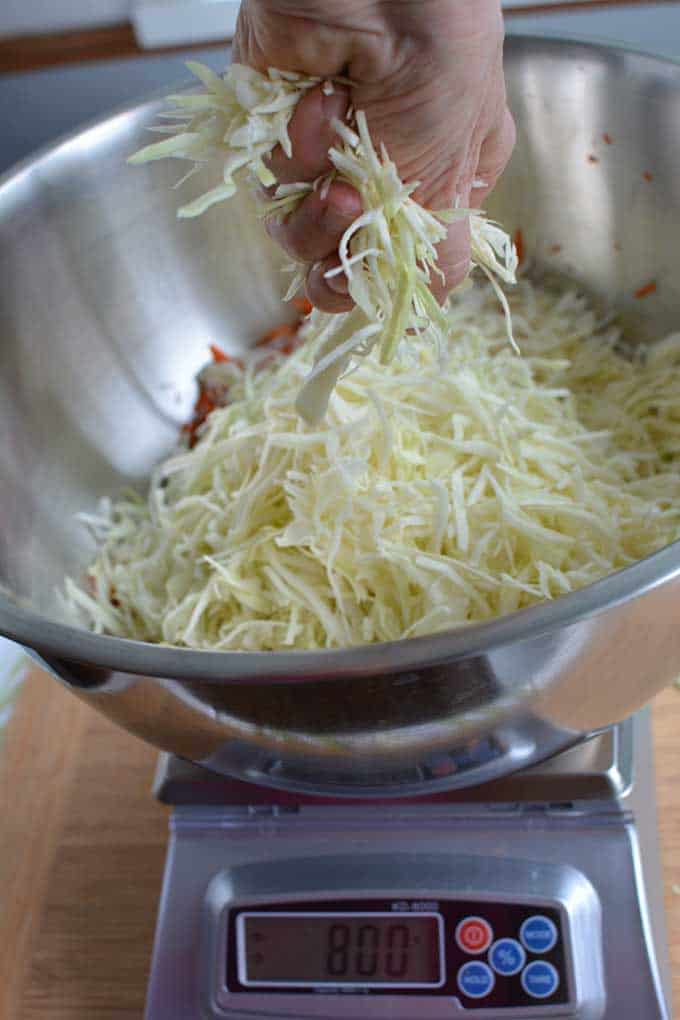
Prevent adding too many sugar-rich vegetables to a ferment. Through experience, I have found most sauerkraut recipes work best, with a maximum of 25% of the total weight being “flavoring” ingredients (shredded carrots, beets, garlic, onion, and whatnot).
The shredded quantity of “2-3 medium beets” can vary greatly depending upon the size of those beets. It is much easier to add enough grated beets to hit 200 grams on the scale – for 25% of an 800-gram batch of sauerkraut – and then add enough cabbage until 800 grams is reached on the scale.
SHOPPING TIP: Purchase a scale with a Baker’s Math feature for a real treat. I searched long and hard for this one for these reasons. The Baker’s Math function eliminates the usual math steps required to add the correct amount of salt.
When you’re done weighing your ingredients, press the “%” key and add salt to the desired percent.
Added bonus? You can program my favorite scale to NOT shut off automatically, as detailed here. There is nothing more frustrating than your scale shutting off when you are in the middle of slicing your cabbage for weighing. Dumping the bowl contents and restarting is no fun.
4. Gently Clean Your Fermentation Equipment
Clean is good. Sterile is not.
Simply wash your jars, lids, and weights with soapy water and rinse well. No more is necessary. For ease—and because I use glass jars for all sorts of things in my kitchen—my jars get run through the dishwasher, but everything else gets gently washed by hand.
Don’t live in fear of the microbial world and feel you need to pull out the bleach bottle to sanitize your jars. Doing so kills everything, including the beneficial bacteria that make fermentation happen.
We are not canning.
We are fermenting.
A mindset change.
With fermentation, we create an environment in which beneficial bacteria—those found living on your cabbage, vegetables, and hands—thrive and grow. When done properly (anaerobic fermentation set up with a salty brine), the environment is inhospitable to pathogenic bacteria.
Trust.
You don’t need to kill off the bad bacteria – as in sanitizing, but instead, you will suffocate them in a salty brine. 🙂
5. Use a Mineral-Rich Salt to Provide Additional Nutrients for the Bacteria
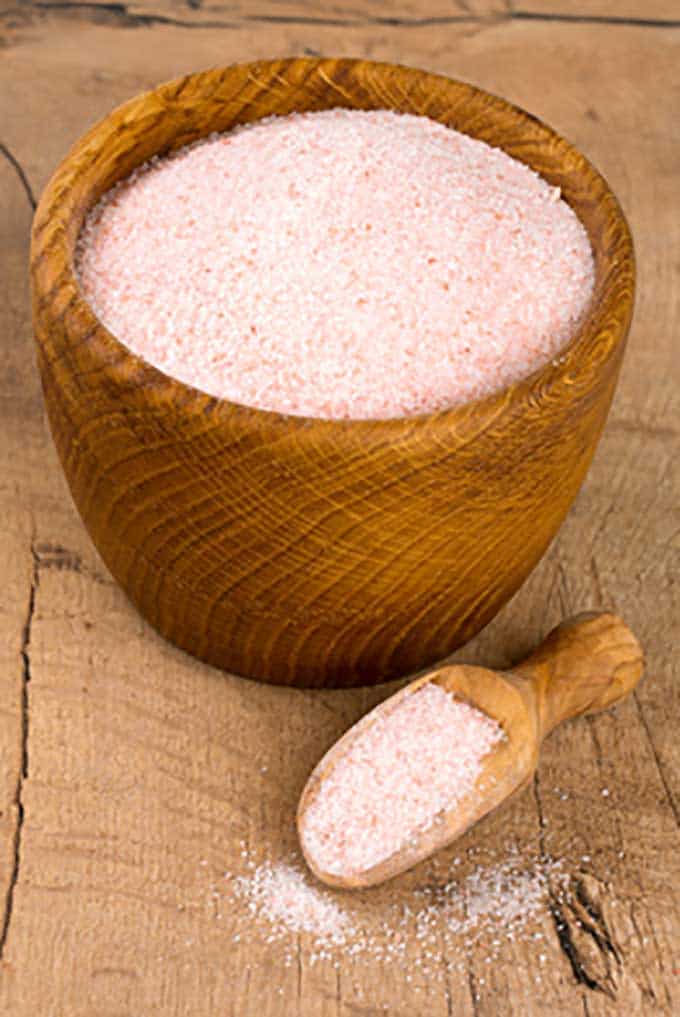
I switched to fermenting only with Himalayan Pink Salt a few years back and noticed a great improvement not only in fermentation but also in flavor. A mineral-rich salt is:
Unrefined. Few people realize that refined salt – like our sugars, flour, and vegetable oils – is highly processed. Table salt is manufactured by heating natural salt to 1,200 degrees Fahrenheit. During this extreme process, the chemical composition is completely altered, and all the trace minerals naturally occurring in the sea are removed.
These are the minerals that our bodies use to regulate blood pressure, nourish our adrenals, and keep us healthy.
Mineral-rich salts like Himalayan Pink Salt and Redmond Real Salt are mined from ancient sea beds crystallized over 200 million years ago and protected from modern-day pollution and impurities.
Dry. Both Himalayan Pink Salt and Redmond Real Salt are dry mineral-rich salts. Celtic Gray Sea Salt, a popular salt for fermentation but not one I recommend, is a wet mineral-rich salt. Its moisture content makes it difficult to correctly calculate the correct percentage of salt to use in a ferment, especially if you are weighing your salt. Also, I found some batches in which I used Celtic Gray Salt molded or had a rather soft texture.
Tastes less salty. If you are using a pure-white table salt that is 99% sodium, you may find that your sauerkraut tastes super salty. Using mineral-rich salt shifts the flavor profile to a new level with a less salty depth of flavor.
Rich in trace minerals, salts rich in minerals contain more food for the bacteria. The absence of trace minerals in refined salt means less food for the bacteria, which is making fermentation happen. Less food means less microbial action.
SHOPPING TIP: When shopping for Sherpa Pink Himalayan Salt – Fine Grain, 5 lbs. | All-Natural, Gluten-Free, No Additives | Perfect for Everyday Cooking & Recipes, you’ll find that you have a choice of grain size: extra-fine, fine, and coarse. Choose fine grain.
Coarse grain is designed for use in salt grinders, and when used in ferments, it takes too long to dissolve. Extra-fine grain works great and dissolves rapidly, but it costs about 60% more. I keep things simple and stick to fine grain.
Himalayan Pink SaltAll of Redmond Real Salt is fine grain.
What is the Best Salt to Use When Making Fermented Sauerkraut?
Salt by Weight for Delicious Sauerkraut… Batch after Batch
6. Weigh Your Salt to Ensure Fermentation Success
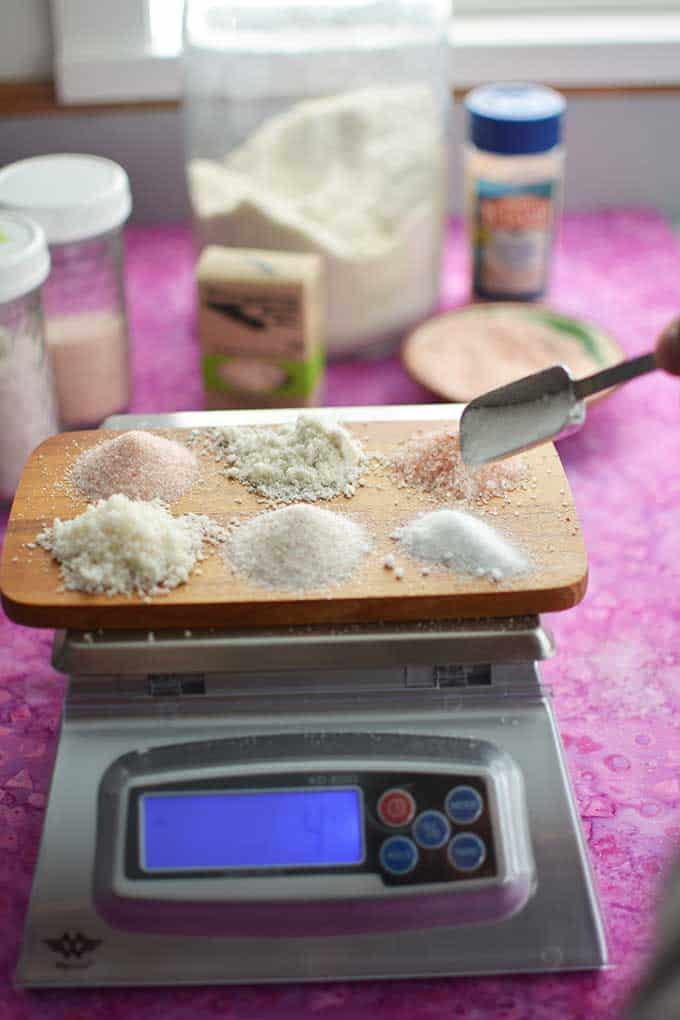
That digital scale recommended in fermentation tip #3? Use it to weigh the right amount of salt.
Set to grams. a digital scale makes it easy to:
Stay within the ideal salinity range of 1.5% to 2.5%. Most research recommends a salinity of 2.0% – 2.5%. The amount of salt called for in my sauerkraut recipes creates a salinity of 2.0%.
Many of us fermenters successfully ferment with a salinity between 1.5% and 2.5%. My sweet spot is 1.75%.
Below a salinity of 1.5%, molds, and yeasts are more likely to dominate. A salinity above 2.5% can interfere with fermentation.
Until recently, I always weighed my ingredients with an old mechanical scale and added a tablespoon of salt. I then upgraded to a digital scale and was soon weighing my salt. This was a game-changer.
Adjust for taste. If you are finding that your sauerkraut tastes way too salty, reduce the amount used in the next batch by just a bit. For example, use 1.75% salt instead of 2.0% salt.
Adjust for ambient fermentation environment. If you’re fermenting during the heat of summer and your house is extra warm, use a tad more to slow down fermentation; in a cold house, a tad less.
7. Keep Your Ferment Below the Brine to Prevent Molds and Bacteria from Taking Hold
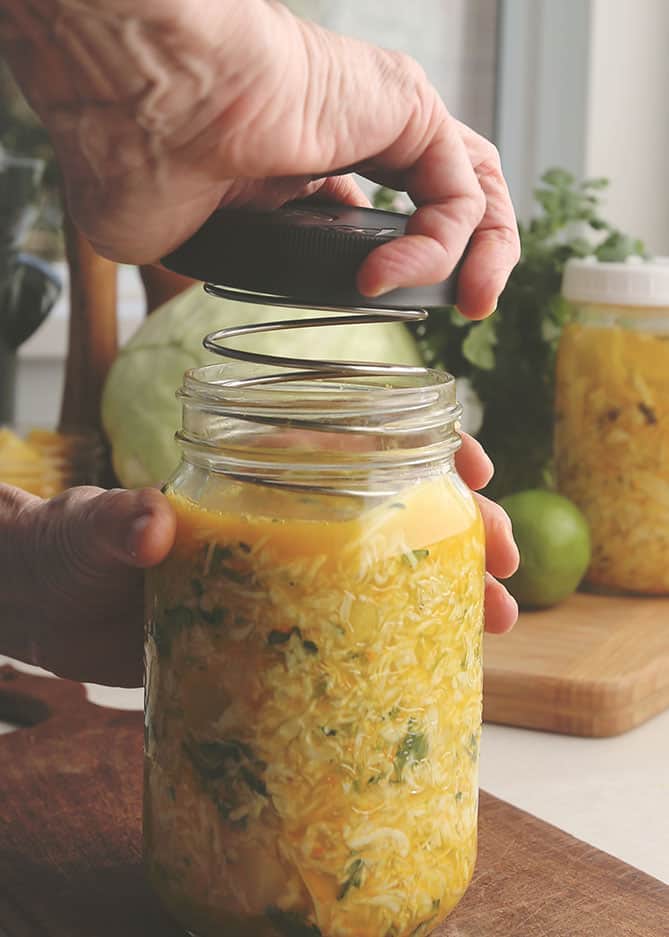
By keeping your ferment below the brine, you prevent the pathogenic bacteria that love fresh air – and can ruin your sauerkraut or other ferments – from establishing residence in your jar of goodness.
In addition, the brine provides a moist environment for the bacteria. Bacteria are like sponges. They don’t pick up nutrients from dry cabbage but will absorb nutrients from the brine and the wet cabbage.
I have found that many of the popular fermentation weights work quite well; however…
I am finding even greater success with fermentation gates.
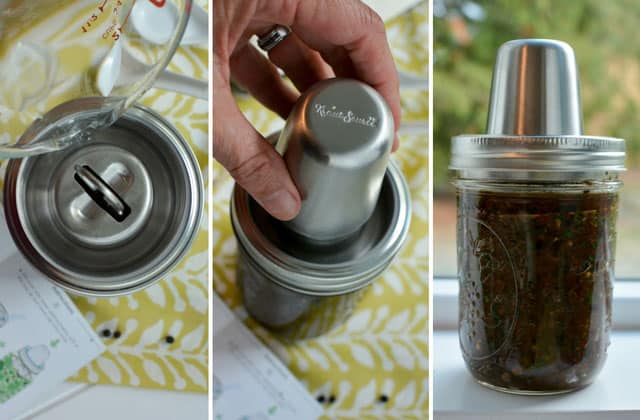
Fermentation gate is a term I have coined to describe a device safely locked inside the neck of your jar, that no matter how much force you apply to it – or how much gas is created by the Mighty Microbes – it will not open or move up in the jar. Your ferment does not bulge up and out of the brine. The following are examples of fermentation gates:
The stainless steel – made in the USA – PickleHelix by Trellis and Co.
The plastic Canning Buddies by ViscoDisc, as reviewed here,
The stainless steel Fermentation Lid by KrautSource, as reviewed here,
I find that my ferments remain below the brine during fermentation with a fermentation gate. A pleasant win.
8. Use a Lid with an Airlock (or Crock with a Water-Sealed Lid) to Keep Your Ferment Anaerobic
Yes, my teaching recipe calls for just a simple lid. I do this to make learning to ferment simple and cost-effective, and to be quite honest, it works quite well.
However, any of the various fermentation lids allow you to keep your ferment truly anaerobic. Yeast and molds need oxygen to survive, so the less air you provide them, the better.
9. Ferment within the Ideal Temperature Range for Happy Bacteria
The ideal temperature range for fermenting vegetables is between 65 and 72°F (18–22°C). Within this range, the bacteria do their best work, creating high levels of lactic acid and a rich flavor profile. However, if your household is warmer or cooler than this ideal range, don’t use that as an excuse not to ferment.
Many are successful by fermenting for a shorter period, cooling things down with an ice chest or cooler, or warming things up with a seedling mat. It just takes a little ingenuity and patience.
10. Graduate to a Water-Sealed Fermentation Crock to Raise the Bar on Your Ferments
Using glass jars for fermentation works beautifully. Their small size allows you to play with flavors, learn the nuances of fermentation, and build up your confidence level with a small initial investment. Plus, you get entertained by what you see going on in the jar.
When your skills are solid, it’s time to graduate to fermenting in a water-sealed crock. With a ceramic water-sealed fermentation crock, you can:
Keep up with household consumption. For just about the same amount of time in the kitchen, you can make 5 or 6 jars of sauerkraut that will last your family a good month instead of that single jar that lasts just a week.
Establish a stable fermentation environment. The thicker ceramic walls reduce temperature fluctuations, resulting in the stages of fermentation properly unfolding.
Ferment sauerkraut with a greater depth of flavor and copious brine. I’ve yet to find research to back this up but rarely do my batches of sauerkraut fermented in one of my water-sealed fermentation crocks end up dry. The larger mass or sauerkraut mixture, along with the thick ceramic walls, allow for more stable temperatures that lactic-acid bacteria seem to prefer.
If you are ready to graduate to a water-sealed fermentation crock because you are looking to up the quality of your sauerkraut, be sure to read the following posts:
Fermentation Crocks: The Who, What, Where, When, Why, and How
Stone Creek Trading Fermenting Crock REVIEW [Attention to Details]
How to Make Sauerkraut In a Crock in 7 Simple Steps [Healthy, Flavorful, Easy]
11. Test the pH of Your Ferment to Reduce Anxiety

The most important factor when determining whether sauerkraut is done fermenting is that acidity has reached a level where pathogenic bacteria can no longer survive, and that enough lactic acid has been produced by the bacteria to call your ferment preserved.
You don’t need paper litmus strips to test the pH of your ferment. Your taste buds can do that. But paper pH test strips are a fun tool in your arsenal. Sauerkraut that has a sour tang is acidic enough to prevent the growth of pathogenic bacteria.
A small investment in pH paper test strips will:
Indicate that fermentation is successful. The acidity level of sauerkraut can be tested with pH test strips . A pH of 4.6 or lower indicates that fermentation is considered successful. Due to the inaccuracies of paper pH strips, most recommend a pH of 4.0 or lower.
In the quart (liter) jar ferments I have tracked, the pH was 6.0 when I packed the jar. Within 24 hours, it had dropped to 5.5, 48 hours, 4.0-4.5 pH, and by day three, 3.5.
If you were to look at pH, one could call your sauerkraut done on Day 3! And though pH is at a “safe” level, the microscopic beings have not been done yet.
Separate from pH is the percent of lactic acid in a ferment. Acids (lactic acid, acetic acid, formic acid, and succinic acid) are formed as the lactic acid bacteria eat the sugars in the ferment. As the percentage of lactic acid rises, the pH drops.
Lactic acid levels increase to 1% around days 3-6, 1.5-2.0% between days 14-16, and 2.5-3.0% at the 3-4 week mark.
Give you peace of mind. Some new to fermentation want to know that their ferment is safe to eat. You might not trust your nose, especially if you’ve never smelled or eaten sauerkraut before.
To test the pH of your ferment, use a spoon or small ladle to grab a bit of brine from your jar or crock and dip the pH test strip into the brine. You may safely eat the ferment if the pH is 4.0 or below. Ensure the pH paper you buy is at the lower end of the pH range (0.0 – 0.6).
It helps you better understand fermentation. You’ll need to read the pH of the brine in your sauerkraut daily during the first week, but do it for a few batches, and you begin to have those “ah-ha” moments. Now, I get this!
It allows one more way to test whether a ferment is safe to eat. With some batches, you don’t know if all the strange things happening are normal. Testing the pH will determine whether a ferment is safe to eat. Do realize, however, that fermentation is very safe and that your nose and gut instinct will tell you when a batch has “gone south” and is not safe to eat.
12. Be Curious, Ask Questions, Read Books
Did the garlic in your ferment turn blue? Don’t panic. Do some searching. Ask questions.
Fun Fact! You may be surprised to learn that blue garlic is caused by a compound found in garlic that, under acidic conditions—fermentation—breaks down and reacts with amino acids to produce the blue-green color. It is safe to eat and has no impact on flavor. Fun!
Two must-have books?
The Art of Fermentation: An In-Depth Exploration of Essential Concepts and Processes from around the WorldThe Classic! An encyclopedia – 500 pages – on anything and everything that can be fermented.
Author Sandor Katz was instrumental in putting fermented foods on the map. Though his recipes are not often detailed, there is plenty of in-depth information to get you started.
Fermented Vegetables: Creative Recipes for Fermenting 64 Vegetables & Herbs in Krauts, Kimchis, Brined Pickles, Chutneys, Relishes & PastesCurrently, it is my favorite fermentation book. After a nice coverage of Fermentation Fundamentals, chapters on Mastering the Basics detail Sauerkraut, Condiments, Brine Pickling, and Kimchi.
Their Fermenting Vegetables A to Z chapter comes in handy. Just harvested a bunch of beets? After sharing their knowledge of beets, recipes for Simple Beet Kraut, Curtido Rojo, Curried Golden Beets, Beet Kvass, and Golden Ginger Beet Kvass with Meyer Lemon follow. Endless inspiration with recipes that work.
13. Label Your Ferments & Make Notes
Please label your jars of ferment. It is so easy to forget when you start any particular jar. Not only is it handy to have the date on the jar to gauge when to stop fermentation, but when you enjoy the delicious stuff, it is nice to know how long you fermented the particular batch you especially love.
I recommend “painter’s tape” over traditional masking tape because it leaves no residue when you’ve reached the bottom of the jar and are ready to remove it.
Place the tape right on the top of the lid, or if that is not possible due to the type of airlock or lid you’re using, put the tape right onto the counter and then place it on the jar lid when it’s time to move it into the refrigerator.
Label the tape with the flavor you’re fermenting and the date started. When it is done fermenting, add in the fermentation length. “10/31/2016 Hawaiian 3 wks”
Take notes. I am my own worst enemy when tracking ingredients and quantities for a particular recipe I’m testing. I’m slowly learning to keep pen and paper handy.
Even if you’re following a recipe, it does help to make a few notes or observations about your ferments. You’ll be thankful when trying to duplicate an award-winning batch of sauerkraut.
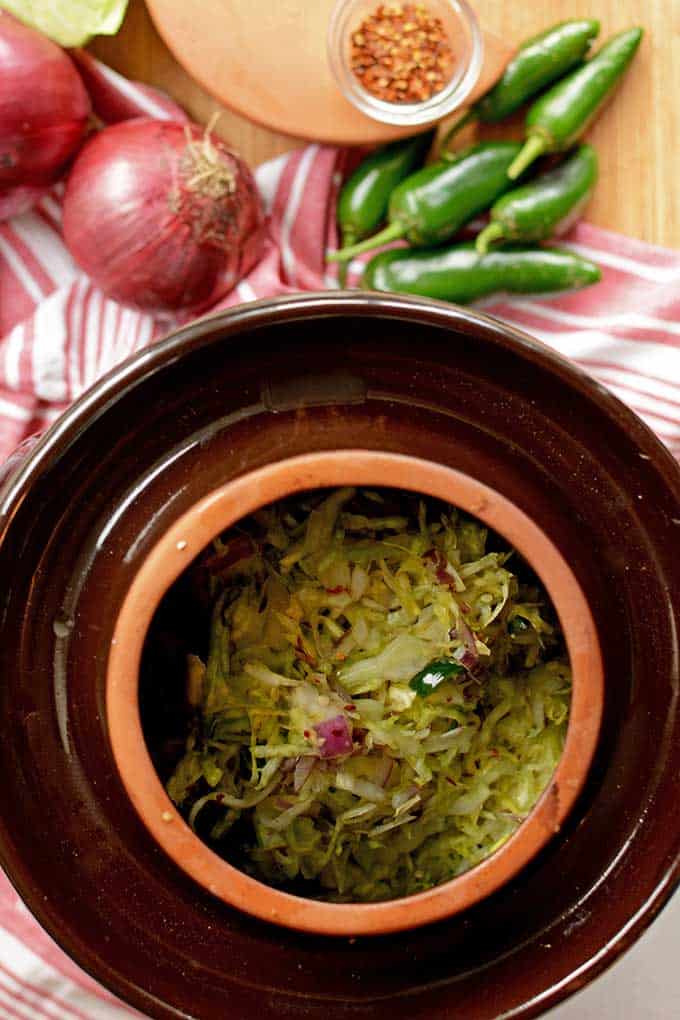
14. Ferment Seasonally for Top-Notch Flavors
When you work with what mother nature provides and when it is provided, you greatly improve the quality of your ferments, and the process is much easier.
Freshly picked vegetables contain plenty of moisture, resulting in copious brine. In addition, fresh vegetables are teeming with the bacteria necessary for fermentation.
By fermenting seasonally, you look forward to each season.
When Spring rolls around and leeks first appear at the markets, you can replenish your supply of last year’s leek paste and know that the warm days of summer are not far off.
Next, pickling cucumbers arrive, and your mouth starts to water for crunchy, refreshing pickles.
In the heat of Summer, you know there will be hot peppers, and maybe you can finally try a batch of fermented hot sauce. And as the days shorten and the leaves turn color, you can look forward to the availability of fresh cranberries at the market and the Pickled Cranberries you’ll be able to ferment and take to holiday parties.
There is great joy in aligning the rhythm of your ferments’ rhythm with the season’s rhythm. And tied to this fermentation tip is fermentation tip #15…
15. Regularly Frequent Local Farmer’s Market for Fresh-Picked Produce
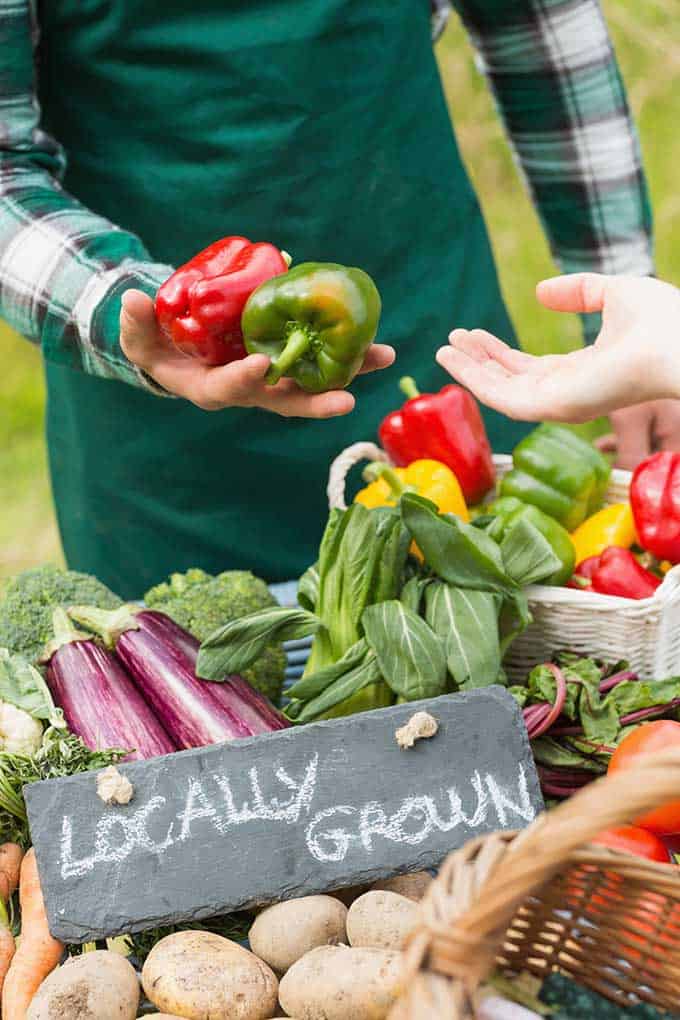
Rising demand for local produce in the last several years has led to many new farmers’ markets opening.
There were 8,268 farmers’ markets operating in 2014, up 180 percent since 2006. There is sure to be a farmer’s market in your community that you can regularly frequent. A farmer’s market will:
Provide fresh, nutrient-rich produce. Produce purchased at the peak of freshness will make fermentation much easier. What you see available was often picked that morning, if not the day before.
Freshly picked produce is alive and vibrant. Produce from the grocery store that has been sitting around for weeks is starting to rot, and its microbial community has shifted to the negative.
Foster relationships with and support those who grow your food. After a few trips to the market, you’ll start to connect with the farmers. Get to know them.
Ask about their growing practices, and if they grow cabbage, they might be happy to grow a variety of fall cabbage for you that is well suited for making sauerkraut.
Expand your fermentation repertoire. Not only will you be purchasing produce at its peak freshness, but you will also get endless ideas on what to ferment just by looking at what is available. What a refreshing way to add variety to your ferments.
When everyone suddenly has garlic for sale, you know it’s time to make Fermented Garlic Paste.
When every stand has a colorful array of carrots, you can make a few batches of Fermented Carrot Sticks.
Save you money. No, the head of cabbage fresh from the market is not cheaper than one purchased from a Big Box store, but it is usually more affordable than buying off-season at your local grocery market. And it ferments beautifully. No wasted batches of dry sauerkraut that didn’t seem to properly ferment.
SHOPPING TIP: To find a local market you can frequent, enter your town’s name or community and “farmer’s market” into your browser’s search field.
That’s it for now for this set of fermentation tips.
What one fermentation tip will you be adding to your fermentation repertoire to up your game?
Last update on 2026-07-14 / Affiliate links / Images from Amazon Product Advertising API

Hi,
Once I am done fermenting the sauerkraut and move it to cold storage, do I remove the outer cabbage leave and fermentation weight? Is it then okay for the cabbage pieces to ‘float’ to the top of the brine once in the fridge?
I leave the cabbage leaf in place until I’m ready to eat it. The weight can be removed and used in a new batch. And don’t worry about any loose bits. I do pack them all down before moving the jar to the fridge and then just let it be.