
 This post may contain affiliate links which won’t change your price but will share some commission.
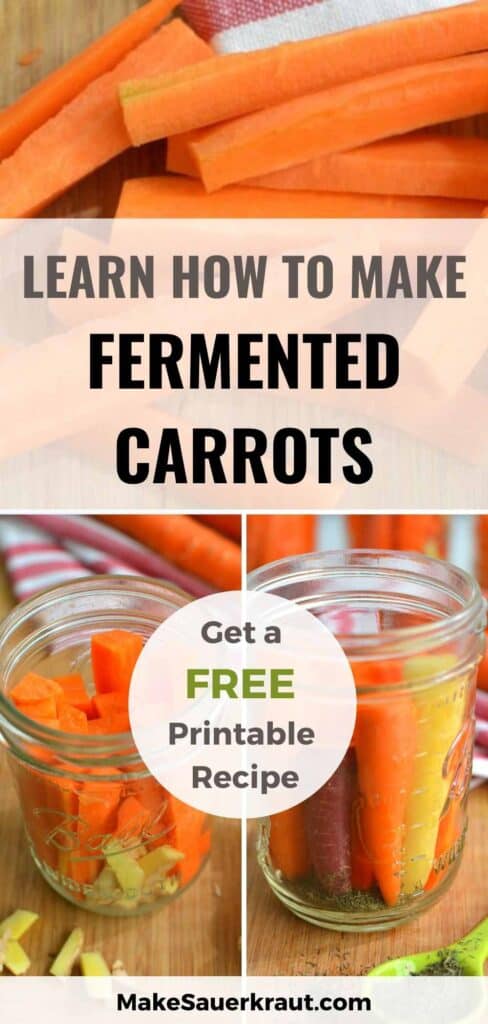
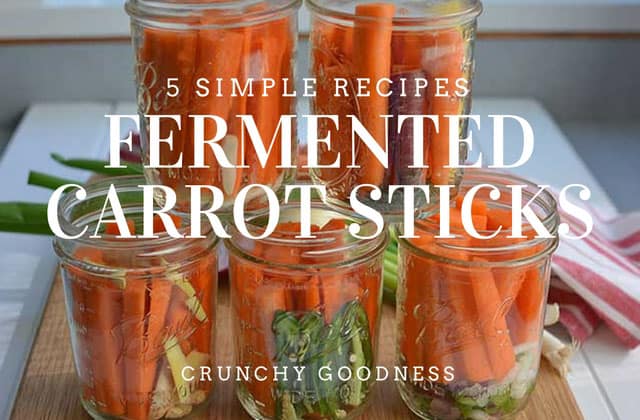
Want a simple, tasty way to get more probiotics? Fermented carrot sticks are delicious, easy to make, and perfect for everyone. Plus, they add a nice pop of color to your meals!

If you’re looking for a new snack that’s both tasty and good for your gut, fermented carrot sticks are a great option.
And, they go perfectly with your favorite dips—blue cheese, hummus, or ranch, you name it.
I’ll guide you step-by-step through the process of making fermented carrot sticks, including tips on salt concentration and flavor suggestions like sweet garlic and firecracker carrot sticks.
It’s as simple as cutting carrots into sticks, placing them in a jar along with some seasoning, and leaving them on your counter for a couple of weeks. This allows the bacteria in the vegetables time to transform them into probiotic-rich superfoods.
We’ll also explore carrots’ hormone-balancing impact, the health benefits of fermented carrots, and ways to enjoy crunchy, probiotic-packed carrot sticks.
Let’s dive into how you can make these simple and healthy snacks at home!
Fermented carrot sticks are great ferment for first-time fermenters. Rarely does something go wrong during fermentation,
And…
They’re ready in a short time.
Before I get to the recipe, let me share two benefits:
The hormone-balancing effects of eating carrots daily, and
The added health benefits of fermenting carrots.
Carrots contain higher levels of beta-carotene than any other vegetable or fruit. Beta-carotene, an essential nutrient for good vision, is converted into Vitamin A in your liver.
Hormone Balancing Impact of Carrots
“There are interesting associations between vegetable “fiber” and estrogens. Because of my own experience in finding that eating a raw carrot daily prevented my migraines, I began to suspect that the carrot fiber was having both a bowel-protective and an antiestrogen effect. Several women who suffered from premenstrual symptoms, including a migraine, had their serum estrogen measured before and after the “carrot diet,” and they found that the carrot lowered their estrogen within a few days, as it relieved their symptoms.” – Ray Peat, Natural Estrogens
Eating one raw—unpeeled—carrot a day can help to:
- Remove toxins from your body.
Raw carrot skins—the peel—contain insoluble fiber that binds to toxins in our intestines and is eliminated in our stools. - Balance your hormones.
Endotoxins are a particular type of toxins that are bound to the insoluble fiber in carrots. Endotoxins can cause an imbalance in your hormones. By consuming carrots, endotoxins—particularly excess estrogen—get safely carried out of your body. - Improve peristaltic movement.
Insoluble fiber relieves constipation and increases regularity. - Can help your liver remove excess estrogen.
One of the jobs of your liver is to remove excess estrogen, but when it is burdened with toxins from the foods we eat and the stress in our daily lives, it can’t keep up. Excess estrogen then becomes a huge problem causing all sorts of health issues—in both men and women—such as mood swings, acne, allergies, thyroid issues, and lack of muscle tone. Consuming insoluble soluble fiber lightens the load on your liver.
It is true that eating massive amounts of carrots can sometimes cause a person’s skin to turn yellowish-orange. This is most noticeable on the palms or soles of feet and is called carotenemia. But don’t worry, it is completely fixable just by reducing carrot intake.
Health Benefits of Fermented Carrots
If you ferment your carrots, they are packed with the same goodness as sauerkraut and other fermented vegetables. They:
- Are an excellent source of probiotics.
Similar to those found in yogurt, probiotics produced during fermentation are known to have many health benefits: improved digestion, enhanced immune system, and better brain function to name a few. - Have increased nutritional value.
Lactic-acid fermentation produces and enhances the levels of enzymes, vitamins, and minerals. - Are easier to digest than raw or cooked vegetables.
Fermentation breaks down hard-to-digest cellulose. - Are safer to eat than raw vegetables.
Raw vegetables can have E.coli on them, but lactic acid produced during fermentation kills off the E.coli bacteria. They can’t survive in the acidic environment of fermentation.

How to Make Fermented Carrot Sticks
Don’t Use a Brine Chart
My recipe for naturally fermented vegetables is different from most of the other recipes on the internet, which rely on numbers from a brine chart.
Most recipes have you pack your jar with vegetables (including some of mine that I have not yet updated), mix a salty brine, and then pour that into the jar.
Results will vary greatly because the weight of the vegetables you packed into the jar varies greatly.
As I researched and developed recipes for my In A Pickle! online course, I realized that you can’t have consistent, safe, mold-free results by just pouring a salty brine into a jar of packed vegetables.
The bacteria responsible for fermentation need a set salt concentration to create the lactic acid necessary for a safe ferment.
You have to know the weight of both the vegetables and the water in your jar and calculate your salt based on that.
Once you know this weight, you multiply it by the recommended salt concentration for the vegetables being fermented and then add the correct number of grams of salt to the jar.
Don’t worry—it’s simple, and I’ll walk you through it step by step.
Salt Concentration Chart FREE Download
Use the button below to get your own printable Salt Concentration Chart.
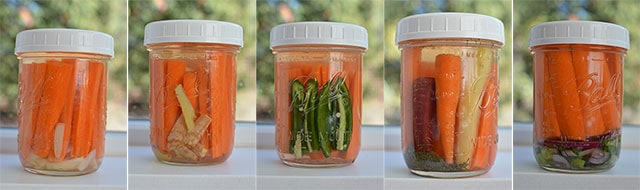
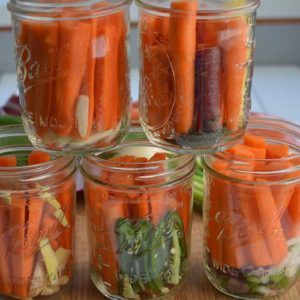
First, here’s the recipe in pictures followed by tips for success, 5 suggestions for flavoring your carrot sticks, and then the step-by-step recipe.
Step-by-Step Recipe Photo Instructions
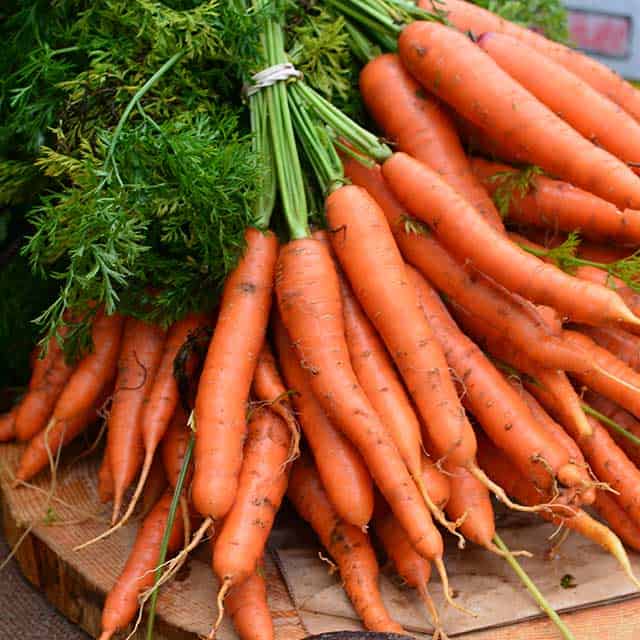
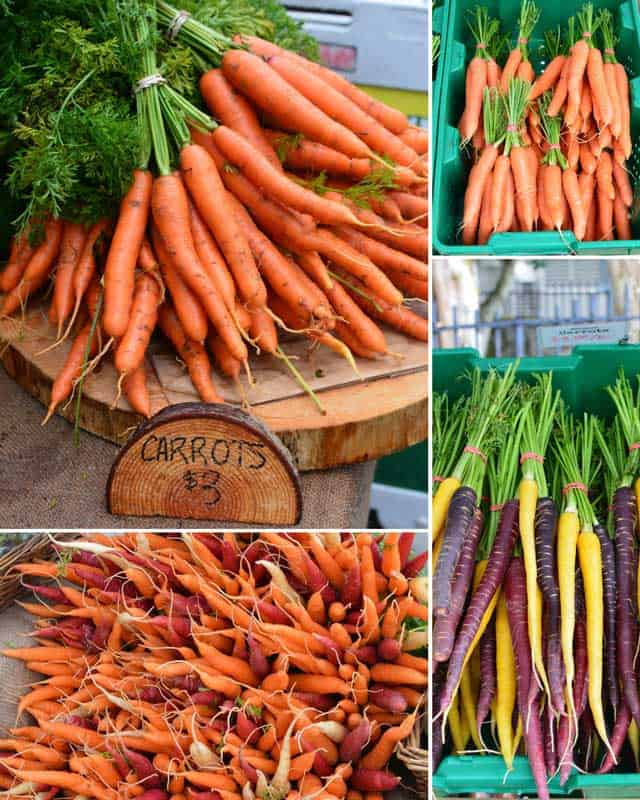
Purchase Fresh Carrots
Fresh carrots are your best choice. A bag of carrots from the grocery store works just fine, but if too old, they may not ferment as well.
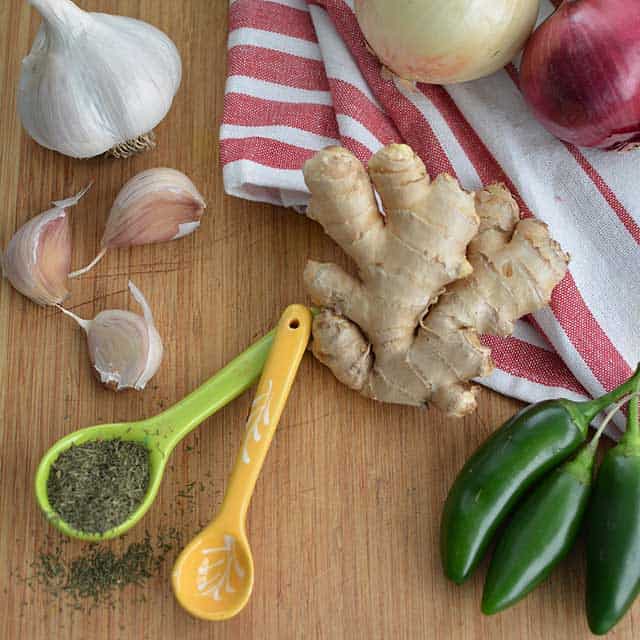
Choose a Way to Flavor Your Carrots
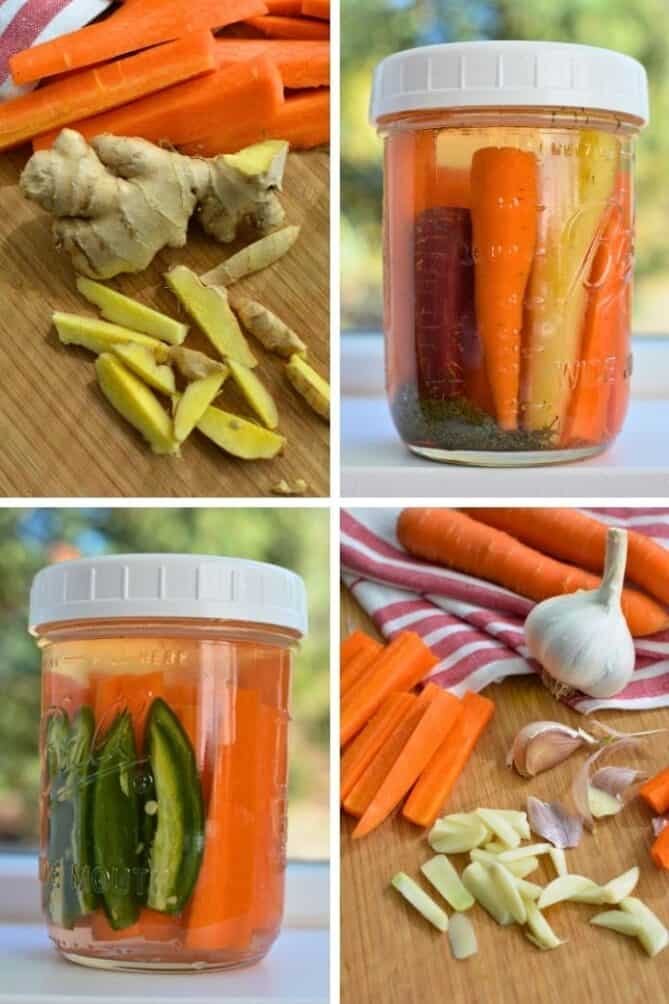
Garlic, ginger, onions, jalapenos, and various spices can all be used to flavor your fermented carrot sticks. In the recipe below, I give you several suggestions.
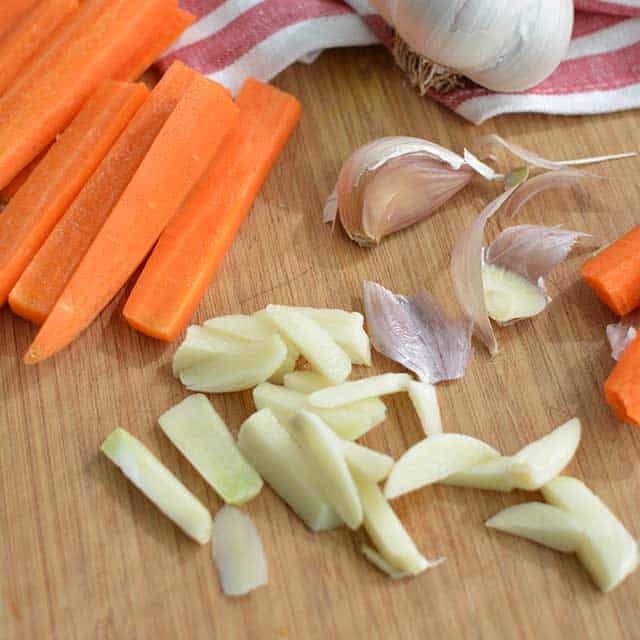
Prepare Flavoring Item
For example, for Sweet Garlic Carrot Sticks, slice garlic cloves into slivers. Place in the bottom of your jar.
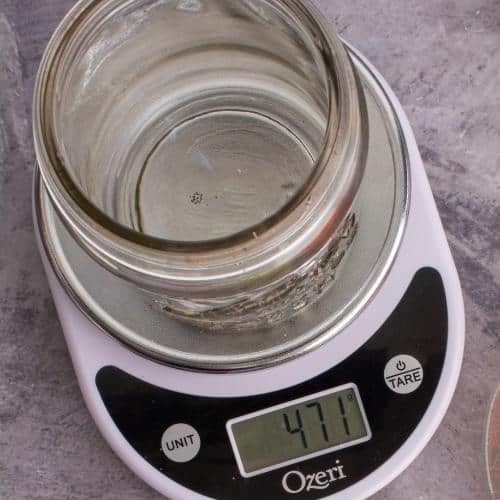
Weigh Jar
Use a digital scale to obtain the weight—tare—of your jar (471 grams, for example). Write this number down.
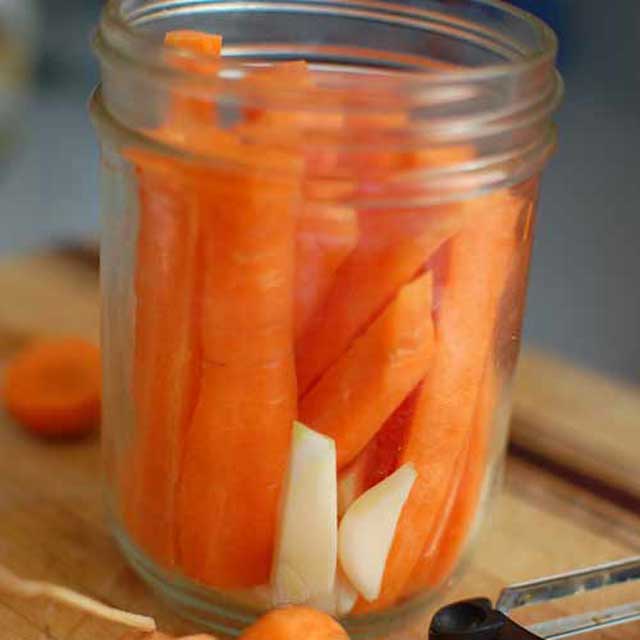
Pack Jar
Pack flavoring Ingredients into the jar. Cut carrots to size to fit into your jar leaving 1 to 2 inches of headspace.
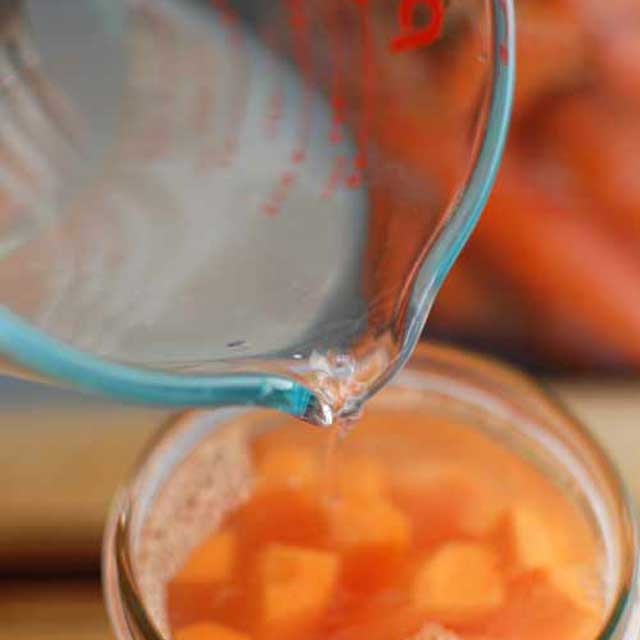
Pour Water Over Carrots
Pour water into the jar, stopping 1-2 inches below the threads of the jar.
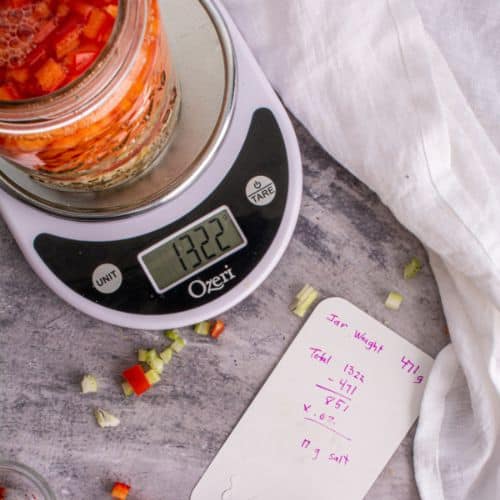
Obtain Weight of Veggies + Water
Weigh your packed jar. The number on the scale is the weight of the jar from step 4, plus the weight of the vegetables and the water (1322 grams, for example).
Subtract the jar weight from the total weight (1322 – 471 = 851, for example).
Calculate & Add Correct Grams of Salt
Carrots require a 2.5% total salt concentration.
Multiply the weight of the contents in your jar by 0.025 (851 x. 0.025 = 21, for example).
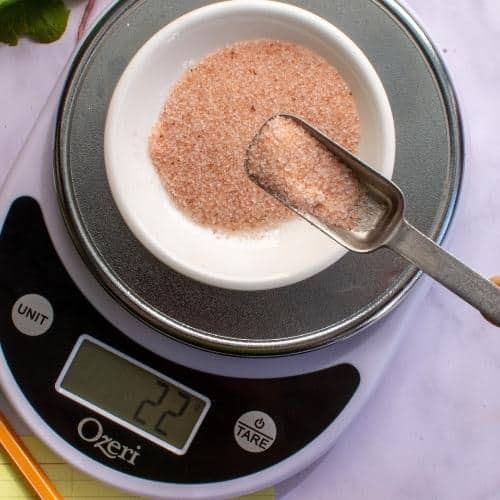
Tare a small dish and weigh the correct grams of salt (21 grams, for example).
Add this salt to your jar of carrots. Screw on the canning lid and rim that came with your jar and shake for one minute to dissolve the salt.
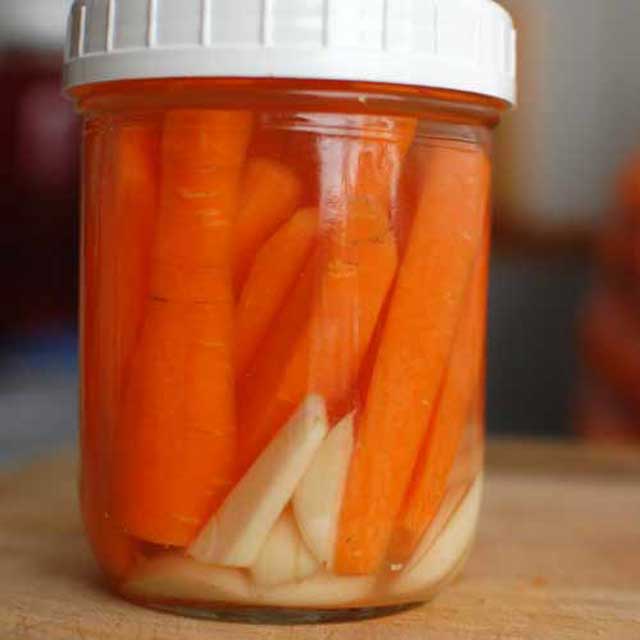
Carrot Sticks Ready for Fermentation
Screw a fermentation lid on snugly, or a plastic lid left a tad loose, and place your jar in a shallow dish on your counter out of direct sunlight to ferment for 7-14 days.
Recipe Flavor Suggestions
I like to keep these simple, though you might not believe that is possible for me with the wide range of creative recipes in my Fermentation Made Easy: Mouthwatering Sauerkraut book.
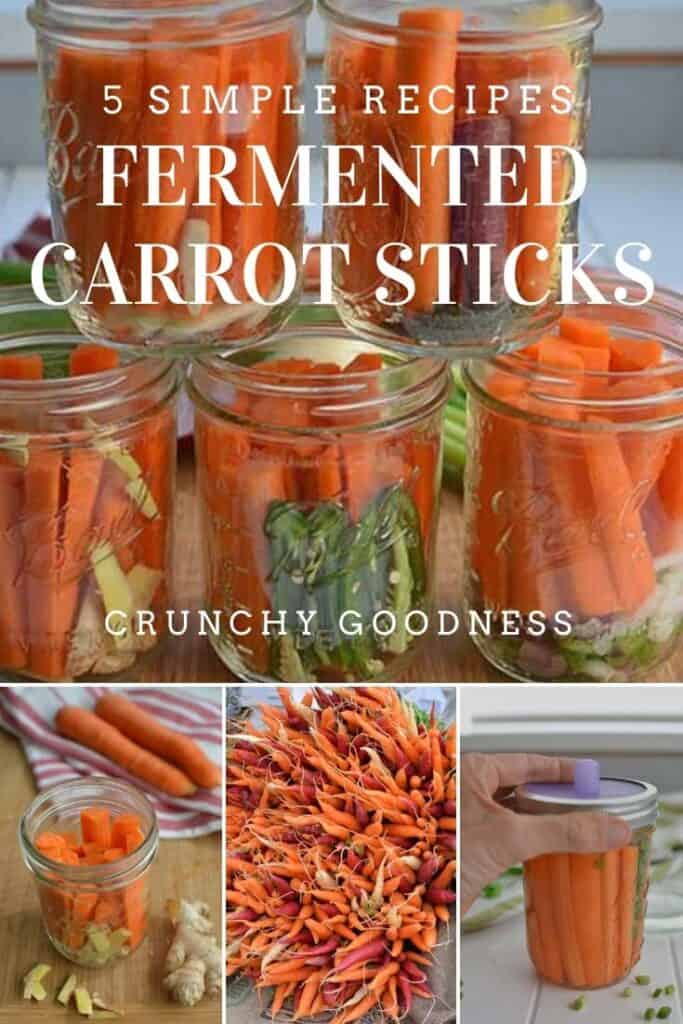
Here are five ways to infuse your fermenting carrot sticks with just a bit of extra zing.
1. Sweet Garlic Fermented Carrot Sticks
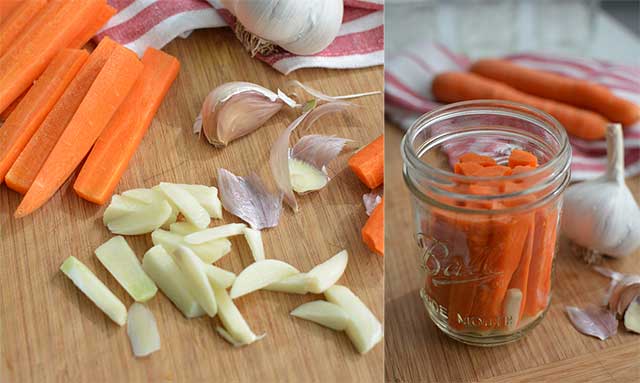
For Fermented Sweet Garlic Carrot Sticks, slice 1-2 peeled garlic cloves into slivers. Place in the bottom of your jar.
2. Fermented Ginger Carrot Sticks
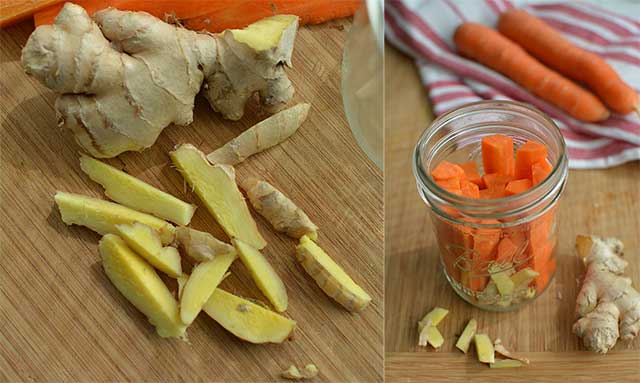
For Fermented Ginger Carrots, slice a 1-inch piece of ginger root into slivers. No need to peel the ginger. Place in the bottom of your jar.
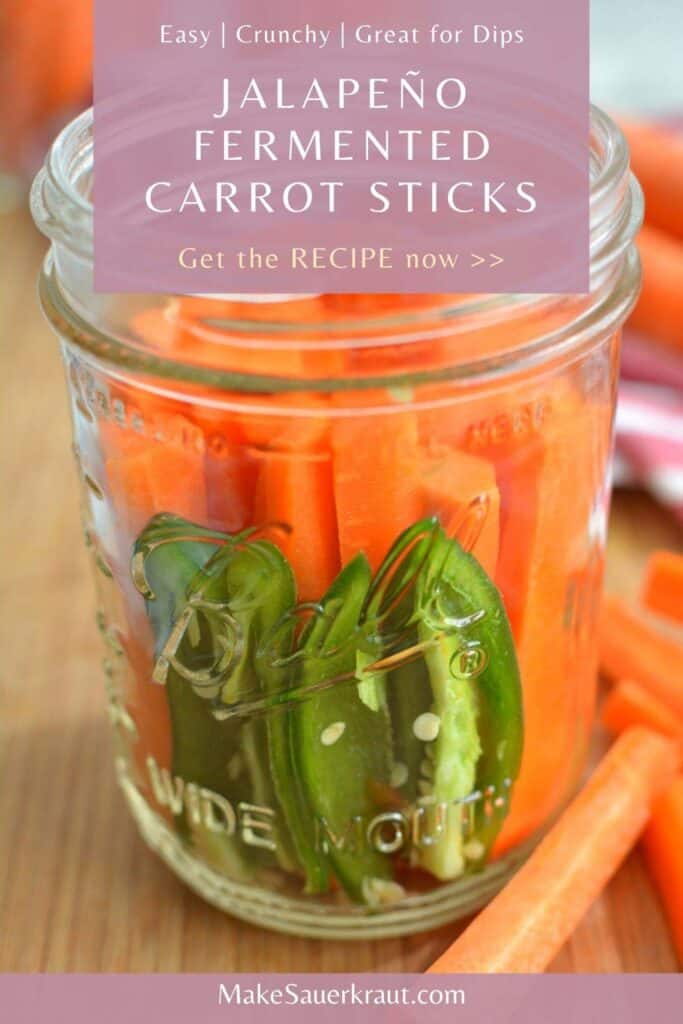
3. Fermented Firecracker Carrot Sticks
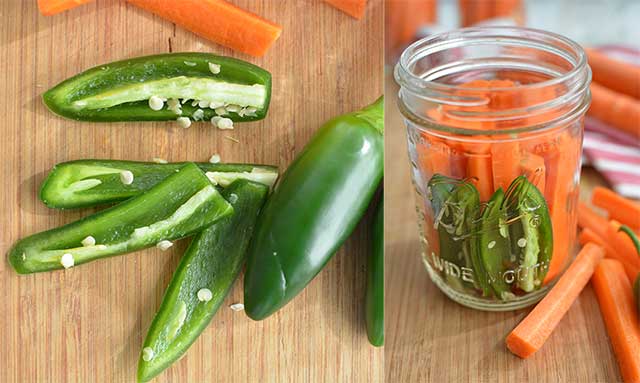
For Fermented Firecracker Carrot Sticks, slice one or two jalapenos into quarters. To reduce heat, remove seeds and membrane. Place in the bottom of your jar. Feel free to add a pinch of oregano, cumin seeds, and red pepper flakes for a greater depth of flavor.
4. Fermented Dilly Delight Carrot Sticks
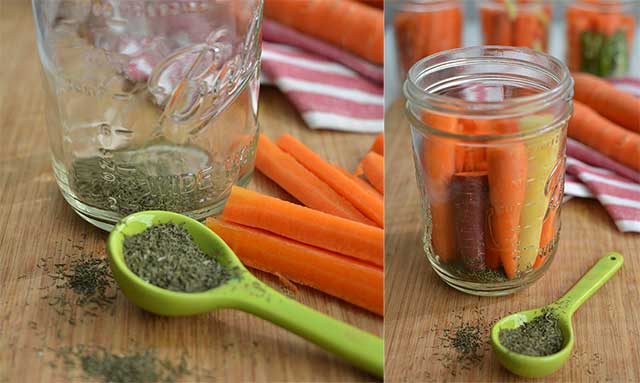
For Fermented Dilly Delight Carrot Sticks, use 1 teaspoon dried or 1 tablespoon fresh dill. Place in the bottom of your jar.
5. Fermented Three-Onion Carrot Sticks
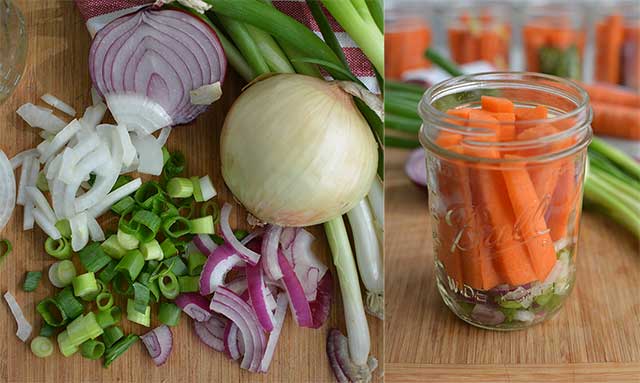
For Fermented Three-Onion Carrot Sticks, roughly chop one green onion and finely slice a bit of red and yellow onion. Place in the bottom of your jar.
")
Get ready to be surprised by the wide variety of pickles you can safely & easily preserve at home.
Learn the Perfect Pickle Process in my online program and “grow” your own probiotic-rich superfoods. YUM!
Tips to Successfully Ferment Carrot Sticks
- Recipe directions are for a one-pint (500 ml) batch.
Feel free to double the recipe and use a larger jar. Some like to use a narrow-mouth jar finding that the smaller opening helps to keep the carrot sticks submerged. With larger jars, there is no need to be careful about the length you cut your carrots. - Packaged baby carrots?
I would not use these—though very handy—due to the fact that they are typically given a chlorine bath—which inhibits fermentation—during processing. - To peel or not to peel?
I’m a peeler though I probably shouldn’t be. Guess why?
The greatest concentration of microbes—that make fermentation happen – reside in the peels of root vegetables (The part that comes in contact with the dirt where those little buggers live.). By peeling the carrot, one might be hindering the process of fermentation.
And… as we learned above, the peel contains insoluble fiber that binds to toxins and removes them from your body.
Time for me to eliminate one of my hangups: The bright and clean carrot look! - My favorite salt for fermentation is Himalayan Pink.
I talk about the best salt for fermentation here. In short, use non-iodized salt. - Use a 2.5% total salt concentration.
Use 2.5% salt by weight for the weight of both the vegetables and the water in your jar. - Below the brine.
For worry-free fermentation, it is best to use some sort of weight to hold the carrot sticks below the brine. However, if packed tightly they seem to stay below the brine on their own.

- No airlock?
Airlocks allow excess gases to escape. If you don’t have an airlock and you want to be super safe, though I don’t feel carrots create enough CO2 to warrant it, burp the jar once daily during the first 3 days. - Simple flavors.
I’ve kept the recipes simple with the addition of just one flavoring item, usually. You can also ferment them on their own with no extras. A hard one for me. - Looking for some kimchi flavor?
Add 1 teaspoon (5 ml) of Korean red pepper powder to a batch. - Adjust fermentation time based on ambient room temperature and desired product.
Ideal fermentation temperature is 65-70°F (18-21°C) is ideal.
Adjust the length of fermentation based on the temperature of your kitchen. If it is super hot, shorten; cold, lengthen. - Eat the fermented flavoring items.
When using garlic, ginger, hot peppers, etc. to add flavor to your ferment, you are also fermenting those items and they can be eaten as well. - Calculate and use fresh brine for each batch of fermented carrots.
See my recent post on why I say: Don’t reuse the brine—or feel you need to use a starter. - Do drink leftover fermented brine, or use it to make salad dressings.
- Keep your fermented carrot sticks handy.
My fermented carrot sticks greet me front and center when I open the refrigerator and are just begging to be snacked on. You might need to do likewise so they are not forgotten somewhere in the back of your refrigerator.
My Five Favorite Fermentation Tools


Fermented Carrot Sticks Recipe
EQUIPMENT
- 1 pint jar
- fermentation weight
- airlock
- canning lid and rim
INGREDIENTS
- 2-3 large carrots, 200-250g prepared
- Iodine-free salt (fine-grain)
- Non-chlorinated water
FLAVORING OPTIONS [Choose from one of the following]
- 2-3 garlic cloves, peeled and cut into slivers
- 1 inch piece of fresh ginger, sliced and cut into slivers (No need to peel.)
- 1-2 jalapeno peppers, sliced lengthwise into quarters, (Remove seeds and white membrane to reduce heat.)
- 1 tsp dried dill, 1 tablespoon fresh
- 1 sliced green onion, red onion and yellow onion
INSTRUCTIONS
- PREP FLAVORING ITEM.Prep what you'll be using to flavor your carrot sticks.
- PREP CARROTS.Gently scrub clean. Then, slice carrots lengthwise to just the right length (one inch shorter than the height of your jar). If you prefer, you could also cut the carrots crosswise into disks.
- WEIGH JAR.Use a digital scale to obtain the weight—tare—of your jar (285 grams, for example). Write this number down.
- PACK JAR.Place what you'll be using to flavor your carrot sticks in the bottom of your jar then snugly pack carrots into the jar leaving one inch of head space.
- TOP WITH WATER. Pour water over carrots letting it percolate down.
- CALCULATE & ADD 2.5% SALT.Weigh your packed jar. The number on the scale is the weight of the jar, plus the weight of the vegetables and the water (793 grams, for example).Subtract the jar weight from the total weight (793 – 285 = 508, for example).Multiply the weight of the contents in your jar by 0.025 (508 x 0.025 = 12.7, for example).Tare a small dish and weigh the correct grams of salt (13 grams, for example). 12.7 rounded to 13.Add this salt to your jar of carrots.
- DISSOLVE SALT.Screw on a standard canning jar lid and rim and tightly secure. Shake the jar for a couple of minutes to dissolve the salt.Remove lid.
- SUBMERGE & SEAL.Add a fermentation weight to keep the vegetables submerged under the brine. Close the jar either with an airlock or with a lid left loose enough to allow CO2 to escape.
- FERMENT.Label with recipe name, date, and salt concentration.Place in a shallow bowl on your kitchen counter, out of direct sunlight to ferment until active bubbling stops, usually, 7-14 days depending upon the temperature of your room.Feel free to taste them along the way. The carrots are ready when bubbles have stopped rising to the surface, there is a slightly sour aroma and the carrots taste tangy.
- STORE.Add the fermentation length to your label and put in the refrigerator. Your fermented carrots may be eaten immediately, but will increase in flavor with time and will keep for up to a year, though they lose color as the months go on.
Notes and Tips
- Recipe directions are for a one-pint (500 ml) batch. Feel free to double the recipe and use a larger jar. Some like to use a narrow-mouth jar finding that the smaller opening helps to keep the carrot sticks submerged. With larger jars, there is no need to be careful about the length you cut your carrots.
- Packaged baby carrots? I would not use these – though very handy – due to the fact that they are typically given a chlorine – which inhibits fermentation – bath during processing.
- To peel or not to peel? The greatest concentration of microbes – that make fermentation happen – reside in the peels of root vegetables (The part that comes in contact with the dirt where those little buggers live.). By peeling the carrot, one is hindering the process of fermentation. And… as we learned above, the peel contains insoluble fiber that binds to toxins and removes them from your body.
- My favorite salt for fermentation is Himalayan Pink. I talk about the best salt for fermentation here, here. In short, use non-iodized salt.
- Leftover brine (not fermented)? If you do not need all of the brine you mixed up, just keep the leftovers in a jar in your refrigerator for future fermentation projects. It will keep for a few weeks.
- Below the brine. For worry-free fermentation, it is best to use some sort of weight to hold the carrot sticks below the brine. However, if packed tightly they seem to stay below the brine on their own.
- No airlock? Airlocks allow excess gases to escape. If you don’t have an airlock and you want to be super safe, though I don’t feel carrots create enough CO2 to warrant it, burp the jar once daily during the first 3 days.
- Adjust fermentation time based on ambient room temperature and desired product. The ideal fermentation temperature is 65-70°F (18-21°C) is ideal. If it is super hot, shorten; cold, lengthen.
- Do drink leftover fermented brine, or use it to make salad dressings.
- Keep your fermented carrot sticks handy. My fermented carrot sticks greet me front and center when I open the refrigerator and are just begging to be snacked on. You might need to do likewise so they are not forgotten somewhere in the back of your refrigerator.

Salt Concentration Chart FREE Download
Use the button below to get your own printable Salt Concentration Chart.
Ways to Eat Fermented Carrot Sticks
Either eat your fermented carrot sticks straight out of the jar or try plunging them into one of these dips:
My Yogurt Cheese recipe flavored to your liking and thinned a bit for dipping.
Herbed Yogurt Cheese from Circle B Kitchen
Homemade Blue Cheese Dressing from I’d Rather Be A Chef
15 Health Benefits of Hummus, According to Science (+ 9 Delicious Hummus Recipes) from Jen Reviews
How to Make Hummus from Scratch from The Kitchn
Yogurt Ranch Dip by Nourishing Days
Sources
Can You Balance Your Hormones with Carrots? + A Recipe! by Holistic Health Herbalist
How Eating One Raw Carrot a Day Can Balance Hormones + Detox the Body by Organic Olivia
Natural Estrogens by Ray Peat
What is your favorite dip for carrots? Let us know in the Comments.
Last update on 2026-07-24 / Affiliate links / Images from Amazon Product Advertising API
Your timing is absolutely perfect, I was just thinking that I should try fermenting carrots and voila, you’ve written a concise and perfect post! Thanks again Holly.
Thank YOU and you’re very welcome. I’ll try to keep my mind-reading skills sharp :-). Let us know if the family enjoys them.
I certainly will 🙂
Holly, I started fermenting some shredded carrots based on your Sweet Garlic Fermented Carrot Sticks recipe, today I found white stuff on the top (see picture) – is it ok to eat? It’s day 6 today. Please advise. https://uploads.disquscdn.com/images/f118fa706b40854a848e8c26efb7e5e72f7008f97abac6fec97df0ecdb68d6d4.jpg ?
That looks like Kahm yeast. Is it powdery or slimy? If powdery, then it’s harmless Kahm yeast. Remove as much as you can and enjoy. Usually from too much air exposure. Next time, fill the jar to the top. Did you use a lid?
If slimy and sticky, you have an imbalance in bacteria and I would probably try again. But, let’s figure out what to do different next time first.
Also, sometimes when the carrots are cut finer – almost shredded – you end up releasing too many sugars and can often have slimy brine. Try quartering the carrots into sticks to see if that helps.
Thanks for your prompt reply and helpful advice. The yeast is not slimy, (it’s like when you put the soup in the fridge and the oil on the surface hardens into little white stuff on the top). I have the lid on but I only filled the jar half full. Probably with the carrot shredded it ends up like that!! I shredded it as I thought I could eat it like sauerkraut 🙂
It’s a good learning experience anyways and I’ll try again! Thanks Holly.
Hi Holly. I do a lot of “quick pickling” starting with a vinegar brine for jalapenos and beets, etc. I prefer a saltier brine all around. With the fermentation method, will the heftier salt content negatively impact the balance and outcome? Thanks.
Good question. It’s hard to say because I haven’t done any vinegar “quick pickling.” I would say, just give it a try with a pint jar. You have nothing to lose and much knowledge to gain. The carrot sticks use a 2% brine. What if any salt gets added to a vinegar pickle?
Thanks. I’ll play it by ear.
Couldn’t give you a percentage. I just salt my quick brine until I’m satisfied with the taste. It varies. Some people prefer a sweeter brine and add more sugar than salt. It’s definitely one of those things that everyone has their own recipe for.
Hello! What kind of lid do you put on the jar during fermentation? Then what kind of lid do you use when you put them in the fridge (if different)? Thank you!
I either use an airlock lid or a one piece plastic lid during fermentation and then always use the white plastic lid for storage.
I have made these several times and my family really likes them! There is a lot of brine left after we finish the carrots. I have saved it and occasionally drank a “shot” but I was wondering if I could add it to my finished saurkraut that has little brine of its own left?
I wouldn’t because it contains different bacteria than what you started with. More here: http://www.makesauerkraut.com/starter-cultures-not-used/
Search for “uses for pickle brine” if you want some other ways to use it. I happily drink my beet brine, but not the carrot brine as much.
made brine that was to salty. Can i reuse brine and carrots. on table for 7 days
Getting ready to ferment Carrot Sticks!
I know the recipes will be great, as I’ve already made Sauerkraut and Giardiniera. Love the results!
Enjoy them. They are a great snack to have on hand.