
 This post may contain affiliate links which won’t change your price but will share some commission.
Struggling with stubborn odors in your plastic and silicone kitchenware? Our guide offers practical, easy-to-follow steps to remove these persistent smells and delves into understanding why these materials are prone to holding odors. These fixes are super simple. No special cleaning products are required.
A reader commented: “Fantastic. I was trying to get the moldy smell from the rubber seal of my thermos flask. I tried bicarbonate of soda, then vinegar. Neither worked, so I tried the suggestion of soaking in dishwashing liquid. It worked. Brilliant.”
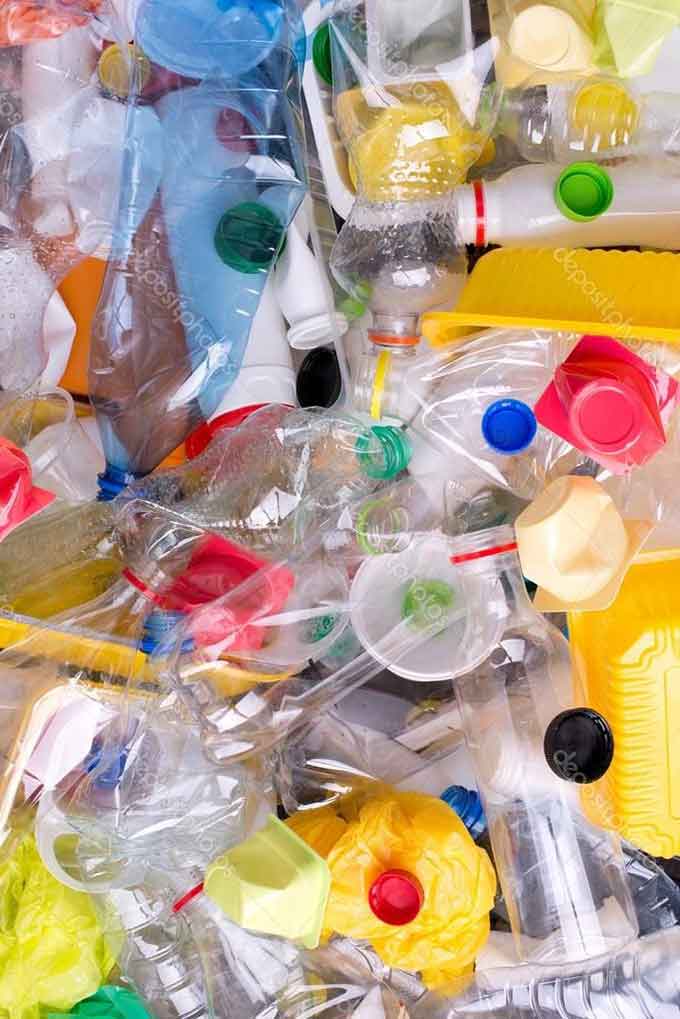
Have you tried to remove lingering smells, such as onion, garlic, and tomato, from plastics or silicone to no avail? What about sour milk or fish? Do you have a pressure cooker and find the silicone sealing ring smells like the last meal? Or a smelly silicone ice tray?
Many suggestions exist for removing smells, such as sealing crumpled newspaper or charcoal in the container, rubbing the items with lemon juice or vinegar, or leaving them in the sun for a day or two.
I tested them all, and I just became frustrated because none of the tips seemed to consistently get rid of the smells.
It wasn’t until I did some deep research and gained some understanding of the basic chemistry of plastics and silicone that it all clicked.
Plastic and silicone are made from different materials and require separate methods for removing odors.
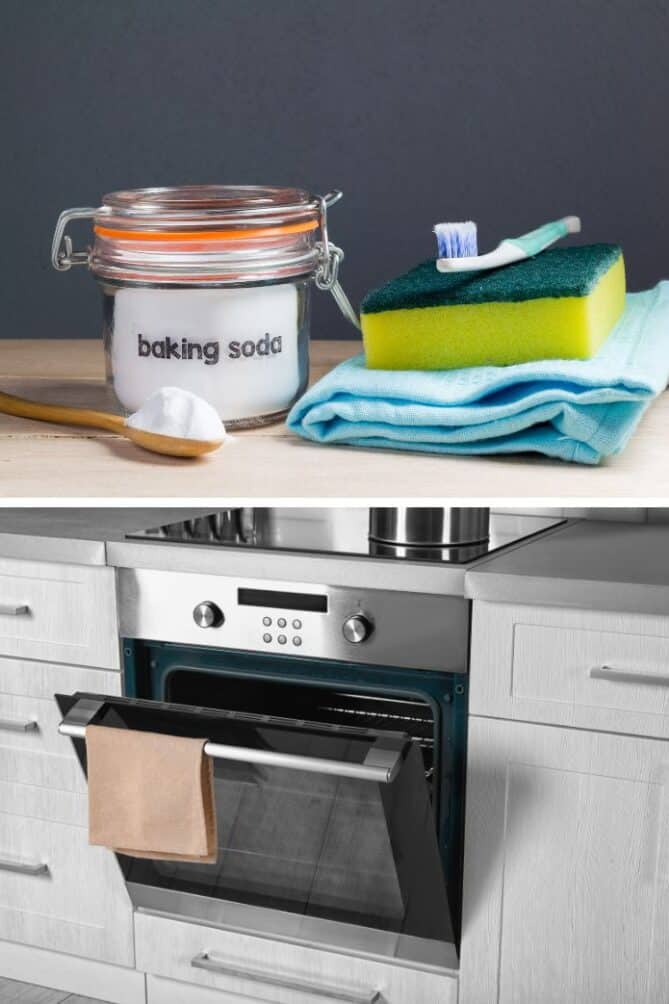
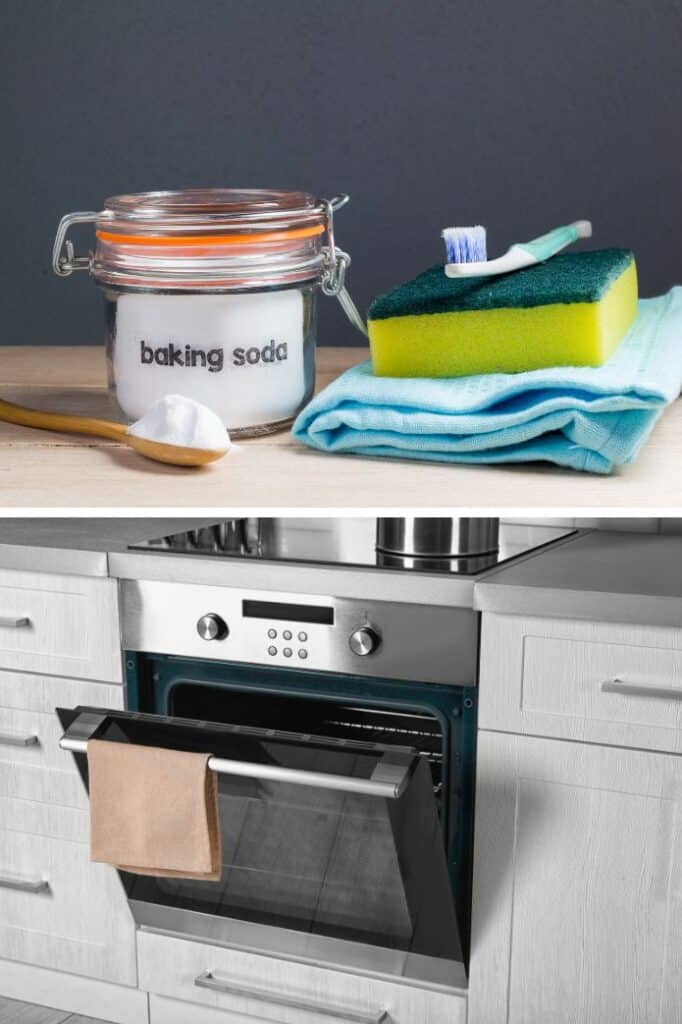
I learned that heat is needed to bake smells out of silicone and that a “base” (baking soda) can neutralize smells in plastic.
And, whatever the method, I wanted to feel comfortable using it. My criteria included:
- No nasty chemicals. I keep a pretty “green” home, so I’m not about to buy some harsh chemicals to clean food containers or my fermentation weights or lids.
- No harsh abrasives. Abrasives can damage silicone and plastic, releasing their manufacturing chemicals or removing non-stick properties.
- No high heat. With silicone, using high heat leaches out chemicals. With plastic, high heat sets odors.
And, now, how do you get rid of those smells?
Use Heat to Remove Smells from Silicone
Whether you are trying to remove odors from your Instant Pot sealing ring or a fermentation lid or weight, it helps to understand the properties of silicone.
Properties of Silicone
Silicone retains odors due to the properties of the molecules used to make silicone.
Silicone is a synthetic polymer of silicon, oxygen, and other elements, typically carbon and hydrogen. It has a rubber-like consistency that is nonstick and resists heat.
When heated, the molecules in the silicone expand, absorbing oils and odors. When the silicone then cools down, the odors get trapped.
ESSENTIAL TIP #1: Use heat to get rid of smells in silicone.
No cleaning supplies are needed. Just some time in your oven.
The application of heat is key for releasing odors from silicone. In this Food52 thread, one contributor shared the following:
“Silicone molecules expand when warm and secrete soaked-in oils and odors.”
Another reader in the thread shared his experience with using heat to remove odors from silicone:
Today I made toasted sriracha sunflower seeds and my Silpat mat was totally sriracha-fied. As mentioned in this thread, I heated my Silpat in the oven, then soaked it in hot water and white vinegar—BINGO!!!! The smell is totally gone. Thank you so much for posting this solution—it was a huge help.
Heating Silicone
Since the only way to remove odors from silicone is to heat it, I wanted to know if there were any dangers from heating silicone.
Silicone is supposedly inert or chemically stable, meaning that the chemicals used to make the silicone do not leach out, especially when heated.
However, that testing was done on medical-grade silicone without fillers or additives and “at body or room temperature.” These studies have shown that silicone is safe at room temperatures, and long-term follow-up data support this.
However, I recalled from the research for my blog post, Can I Use Plastic? Silicone? Stainless Steel? for Fermentation, that heating silicone to “high” temperatures, as in bakeware, causes leaching of chemicals.
How high is “high?”
Silicone can be stable up to 300°F (150°C), even for a very long time.
I played around with temperatures and methods and came up with the following solution.
What is the best way to get the stink out of Silicon?
First, make sure your silicone item is 100% silicone. Check with the manufacturer, or use the “Twist” Test.
The “twist” test is an easy way to assess the quality of a silicone cookware item. All you have to do is take a silicone product in your hands and twist it. If lots of white streaks appear, it indicates the presence of a large amount of fillers. Pure silicone (safer) will hold its color when twisted. – Belgoods Bakeware
Note: If you see a white powdery sheen developing on your silicone items, it may not be made from 100% food-grade silicone. When purchasing silicone items, look for “100% FDA-approved food-grade silicone” in the product description.
How to Get Smell out of Silicone
- Preheat the oven to 250°F (120°C).
- As the oven is heating, use a gentle dish soap—and a soft sponge or cloth—to wash your silicone item to remove any oils or food residue. Don’t use the rough side of the sponge or a plastic scrubby. Doing so just moves the oils around.
- Place your silicone item on a cookie sheet and put it in the oven to bake out the odors.
- Set a timer for 20 minutes.
- When the timer goes off, give your silicone item the “whiff” test. Pull your silicone item out of the oven and smell it, being careful not to burn your nose.
If there is any lingering smell, return it to the oven for 10 minutes. Repeat until no odors remain. It should take no longer than one hour. - Let it cool, and give it a final wash.
I used this method to remove the smell of spaghetti sauce from the silicone gasket for my Instant Pot and the smell of fermented garlic from my Pickle Pusher.
Use a Base to Neutralize Plastic Smells
Whether you are trying to remove odors from plastic storage containers or a fermentation lid, it helps to understand the properties of plastic.
Properties of Plastic
Plastic is made from hydrocarbons derived from petroleum or natural gas. The hydrocarbons are formed into chains called polymers or plastic resins. Different grades of plastics can be created by combining hydrocarbon molecules in different ways.
Normally, with just a bit of soap and water, you can wipe down the plastic and remove odors. But, if smelly residues have permeated too long, plastic can develop a long-lasting pervasive odor. In addition, heat can set odors.
Chemistry Lesson: Acids, Bases, and Solvents
Disclaimer. Chemistry is *not* my strong suit. Professor Google helped me on this one, along with Tim from Melbourne, Australia, who shared his wisdom in this thread.
What happens when you mix vinegar and baking soda? Yes, it bubbles. That bubbling is a chemical reaction. An acid and a base reacting and forming what chemist call ‘salts.’ Salts that grab odors impregnated in the plastic.
Essential Tip #2: Use a base to neutralize smells in plastic.
If your smell is from a slightly acidic food, which is generally the case, a base will help remove the odor. Fermented foods are acidic, so you would use a base to neutralize them.
White vinegar, tomato juice, and lemon juice are acids and will not create the chemical reaction we are looking for.
BONUS TIP: To lift off oils or residue, use a soft sponge or cloth when washing your plastic items. Don’t use the rough side of the sponge or a plastic scrubby. Doing so just moves the oils around.
Directions for Odor Removal from Plastics
- Neutralize the smell with a base. Either sprinkle the item with a nice layer of baking soda—a base—or fill the smelly container with water and add a tablespoon to neutralize the odor. Gently massage baking soda into the plastic with wet hands.
Bleach and dishwashing machine detergent are also bases but not materials I want to use on my plastics. - Leave sit for a few hours. I don’t know if time helps from a chemistry standpoint, but I felt it did.
- Wash “salts” away with a solvent. Rinse off baking soda, then use dish soap—a solvent—and a soft sponge or cloth to remove the “salts” that formed from the reaction you created.
The dish soap breaks apart food molecules stuck to a dish, and the water removes the stuff.
Distilled water and alcohol are also solvents. - If odors still linger, repeat steps 1-3, or try Step 5 and/or Step 6.
- Let sit in an odor-absorbing material for up to 3 days. If there are lingering odors, place the item in an odor-absorbing material to trap remaining odors. A natural (clay) based or non-toxic cat litter, activated charcoal, coffee grounds, and crumpled newspaper are all possibilities. One of my readers had great success with a bucket of garden dirt. Maybe the bacteria “eat” the odors. 🙂
- “Apply” UV Light and let Ventilate. Placing your plastic item outside within direct sunlight will do much to remove odor. The ultraviolet rays, fresh air, and open space will all work to neutralize the odor and lift it away. Place the item outside on a sunny day until the odor is gone.
Other Ways to Neutralize an Acid Smell on Plastic with a Base
- Bleach. Soak the item in a mix of 1 part bleach and five parts water. Let soak for about an hour. Wash well with soapy water.
- Dishwashing Machine Detergent. If the item is dishwasher safe, wash in the dishwasher. You could also soak the item in the detergent.
Frequently Asked Questions
White vinegar, tomato juice, and lemon juice are acids and are not the most effective options to remove smells from plastic. In addition, acidic products, used on a regular basis, can eat away at plastic over time.
Silicone can hold smells, particularly from strong odors. This is because silicone is a porous material, allowing odors to penetrate its surface.
Other Solutions?
Is all this work to remove odors in plastic or silicone fermentation weights and lids more trouble than it’s worth? This is a good question that I will leave for you to answer.
In my blog post, Can I Use Plastic? Silicone? Stainless Steel? for Fermentation I cover all the pros and cons of each material.
Perhaps an easier solution is to use only glass and stainless steel for fermentation. And use glass storage containers when possible.
Glass Fermentation Items
Here are some currently available glass fermentation weights. I show the ones with handles since they are so much easier to remove from your jar. 🙂


Stainless Steel Fermentation Items
Here are some currently available stainless steel fermentation kits. You can’t get a seal on your jar without the use of some rubber or silicone. Silicone is used where noted.


Please Share in the Comments Section!
What have you tried? What works for you? What does not work?
Together, we can banish these pervasive odors from our homes.
Last update on 2026-07-25 / Affiliate links / Images from Amazon Product Advertising API


I have noticed this as well with my Pickle Pushers and was only recently wondering if there was a way to minimize or eliminate the (increasing) odors – what a timely post, Holly. Now I have a method to try this weekend. You truly are the Sauerkraut Wizard!
Thank you. -Steve
You’re welcome. Let me know how it works for you. 🙂
Hi Holly,
For sauerkraut, kimchee, and other fermentation, I cut a piece of the thicker, greener outside leaves of the cabbage (marking it with a lid) with a scissors and place that disc on the top of the food, just below the narrowing in the jar neck for the lid screws. I make the diameter of the disc a little larger than exact and the extra area allows me to press the disc in so that there is very little leakage around the edges. I make sure there’s enough liquid in batch to cover the disc up to about half way of the screw part of the jar. For the first few days, I daily push down on the disc and hit the bottom of the jar against the counter, which releases air and CO2 bubbles that form during fermentation. If I don’t do that, the gas will push up on everything and expel considerable liquid out of the jar. After a few days there’s no need for that because gas-producing fermentation has greatly subsides. This all takes maybe a little skill, but I have it down pretty well now and it works wonderfully.
The disc cap, being one thick piece lags a bit in fermenting, but by the time I finish the quart, it’s very tasty. I have also transferred the cap to a pint jar, with enough fermentation liquid to cover, and sometimes I add the cap from several different batches and keep the jar in the fridge. It lasts extremely long, though you can eat it at any time. After a while, it will considerably soften.
It’s my policy not to let any kind of material, other than natural, durable material to touch fermenting food. I mean materials such as glass, ceramic, wood,… actually, not much else. I’m leery of any kind of metal. Even stainless steel, which I believe can leach chrome into the food.
In my opinion, no one knows the consequences of using manmade materials such as polymers, rubbers, elastomers, metals, and so forth in the presence of food fermentation. I became wise to this many decades ago when I was experimenting with bread making. By the way, and tooting my own horn, and as far as I’m aware, completely on my own, I invented the idea of no-knead bread and overnight fermentation of the dough, back in the 1970’s. I became famous in my own little pond for making the “best tasting white bread.” In the last decade the no-knead and overnight fermentation has become popular, instigated by a food article in the NY Times, just several years ago. But I digress.
So, back in the 70’s when I was experimenting, I used tap (chlorine) water to ferment by my method. When I tasted the dough the next day, I couldn’t believe how bitter the taste was. I had always used well water for my fermentation of foods and drinks, so I knew right away that there’s something not good going on when chlorinated water is used to ferment food. Reading more on the issue, I concluded that chlorine in the water might very well be making chlorinated hydrocarbons in the food. Chlorinated hydrocarbons are often carcinogenic, if not just downright harmful to health. As I say, nobody understands all the complexities and chemical complexities of food fermentation, and so I figured that I should play it safe and use only unadulterated items in food fermentation, and for that matter, in any way that would put these things in my body, where again, nobody understands completely what’s going on.
Back to fermentation lids. Because of all that, I don’t see the necessity of taking a crash course in Chemistry, then graduating with a mistaken idea that I know what’s going on with the use of polymers, etc. with food fermentation.
Holly, I believe you are doing a great public good by promoting traditionally fermented foods. Please understand, the use of some of the materials that you recommend is not traditional. Some of us may think I’m being picayune. To those I advise to take a closer look at the issue, keeping in mind that no Chemist or food advocate can assure you that their advice cannot lead to debilitating diseases. Indeed, even traditional fermentation methods will cause debilitating diseases in some of us. But there again, knowledge is our friend, and knowing what we don’t know can sometimes save our lives. Perhaps it would help us all if some of us did some research in an attempt to figure out why traditional methods sometimes cause cancer. Did the food contain moldy growths? Did they use adulterated water or otherwise tainted ingredients? Were high temperatures involved in the process? Such questions are difficult, and I see no reason to add to the uncertainties by adding more unknowns in the process.
I thank you again Holly for your efforts in bringing your basic message to the public. You inspired me and sent me on a journey of discovery. We are all on a journey of discovery. Keep up the good work.
Best regards,
Tom
Hello Tom, Thank you for chiming in and sharing your thoughts here. It gets us all thinking about our choices. I guess you’re using the cabbage leaf cut to size not only as a “floaties trap” but also as a weight with the help of a little poking and prodding by you. Good observations there on the heaving that happens early on.
Yes, I do completely agree with your “play it safe” maxim. My top choice would be to ferment in water-sealed ceramic crocks with stone or glass weights. This would avoid ever having to remove odors from the “best” weight or “best” lid out there.
However, I feel learning this fermentation skill is more important than obsessing over plastic vs. silicone vs. stainless steel. But, once this fermentation skill is learned, one is empowered, and then if “called to” will slowly fine tune the process and up the quality of materials used. What I fermented with early on (marbles, glass jewels, plastic lids cut to size), I would not use today. I use very little plastics in my day-to-day life and am trying to reduce them even further. [National Geographic just came out with an article that all our sea salts are contaminated with micro plastics! Where does it end? Where does that put us on our salt choice?] But, some of my readers aren’t that far down the “plastic-free” path yet and just want to ferment. So, I let them have that joy, guilt free.
Yes, I realize these fancy gadgets are not traditional and there will always be endless questions. Keep on asking them. They are always good for the mind and future choices.
May we all continue on our journey of discovery.
Hi Holly, thanks for taking my comments in the best way, and I do realize that we are all our own point along the winding path. As you say, these are my own opinions and I don’t expect that everyone else should adopt the same.
You’re quite welcome and thank you for keeping my brain working with your ideas and opinions. 🙂
Hey Tom, For some reason your lovely, long comment on the Fish Sauce post is not showing up in the comment thread on the post (just in the email notification). I can’t look into it until next week. I’ll figure it out and reply. Found all your shared fascinating.
Hi Holly, thanks for the notice. I first wrote that in a Word docx file, then copied it to the comments section. Maybe that has something to do with it. The good news is that I still have a copy of it and I could try different ways to post it. Let me know what you suggest. – Tom
Hi Tom, Why don’t you go ahead and repost it to the Fish Sauce post and we’ll see if it works the second time around. I see it on my email dashboard; it just doesn’t show up in the post comments. Thank You!
Fantastic. I was trying to get mouldy smell from the rubber seal of my thermos flask. I tried bicarbonate of soda, then vinegar. Neither worked so I tried the suggestion of soaking in dishwashing liquid. It worked. Brilliant.
Excellent. I’m glad you found a solution.
Wow….. what a great article. You’ve covered every angle❣️ thanks so much.
You are so welcome! Always fun to learn (and share) helpful tips. 🤗
What about a pop up thermos lid with plastic and silicone that are joined together? Hmmm.
Good question. I haven’t tried to remove odors from a combo like that. You need the heat to unlock the odors from the silicone but I would hate to damage the plastic by heating it. But… it’s a low temp. Hmmm.