
 This post may contain affiliate links which won’t change your price but will share some commission.

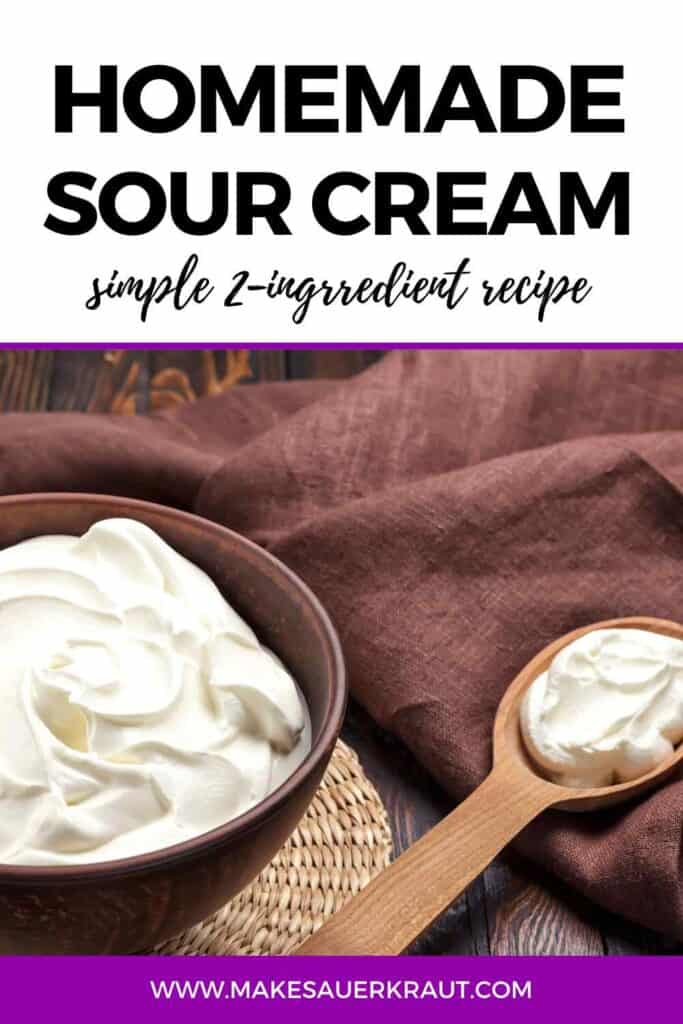
Discover the joy of making your own tangy, creamy, and preservative-free sour cream at home. With just two ingredients and an ancient fermentation (culturing) method, you will be able to enjoy a healthier, additive-free alternative to store-bought versions. Get ready to embrace a kitchen adventure that’s as satisfying as it is sustainable.
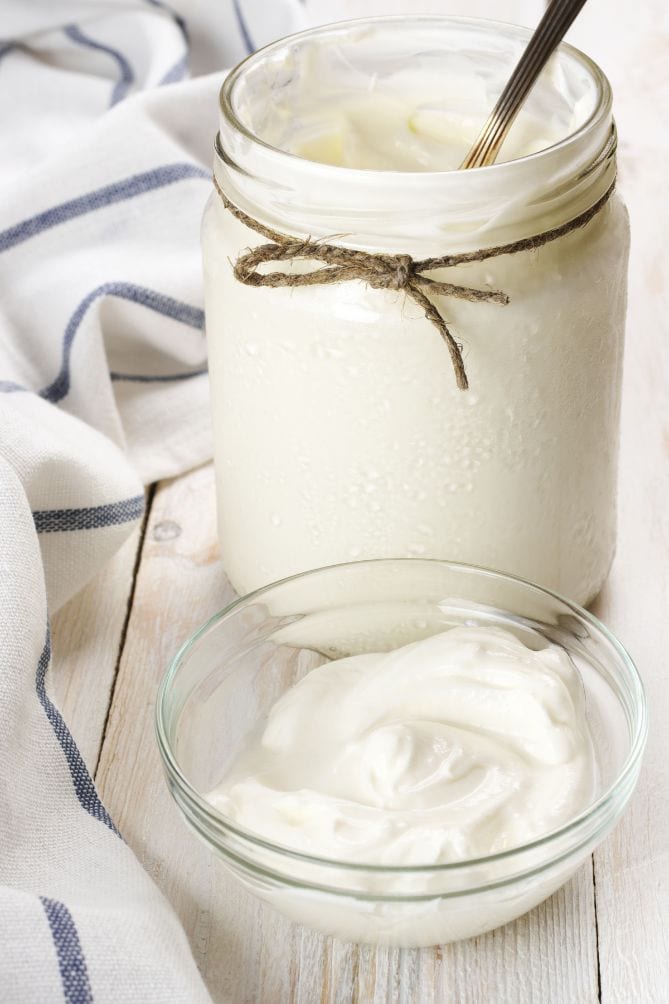
Last week, after I mixed a few tablespoons 🥄 of crème fraîche into a pint of cream 🐄 and left it on my counter to culture for 24 hours, I was blown away (again!) by the transformation that happened inside that jar.
My jar of cream soured and thickened overnight and left me to wonder at the delicious tangy flavor and creamy texture.
Thank you bodacious bacteria. 🦠 You never cease to amaze me.
Even after making my own sour cream on and off (more off than on) over the past twenty years, I was still wowed by how such a simple process can make such wonderful, flavorful, and healthy foods.
Culturing your own sour cream is surprisingly straightforward. With just high-quality heavy cream and a small amount of store-bought sour cream as your “starter,” you’re ready to begin.
Not only is this process incredibly simple, but it also gives you a flavorful, healthy, and additive-free alternative to store-bought versions.
And, with homemade sour cream, you don’t have yet another plastic container to decide what to do with. Zero waste!
What is Sour Cream (and… Crème Fraîche)?
Sour cream is a popular dairy product, loved for its rich texture and tangy taste. It’s traditionally made by fermenting regular cream with certain types of lactic acid bacteria. This fermentation process thickens the cream and gives it a characteristic sour flavor.
Sour cream’s close relative, crème fraîche, is also a fermented dairy product but has a couple of key differences. Crème fraîche is made from cream with a higher fat content (typically 30%) and has a milder, less tangy flavor compared to sour cream.
While sour cream can sometimes curdle when heated, crème fraîche’s higher fat content makes it more heat-stable, ideal for cooking.
Not only does this process transform the cream’s taste and texture, but it also boosts its nutritional value by adding beneficial probiotics.
Why Make Your Own?
Homemade sour cream is fresh, preservative-free, and you control the ingredients, ensuring a healthier option.
I hadn’t cultured my own sour cream in years, but every time I look at the list of ingredients in the sour cream I regularly buy, I knew I needed to.
Check out these ingredients:
- organic milk*,
- organic cream,
- skim milk powder,
- organic tapioca starch,
- guar gum, carrageenan,
- and bacterial cultures,
Time to avoid all those unnecessary items.
Homemade sour cream also offers an opportunity to reduce packaging waste, supporting eco-friendly practices. Plus, there’s something deeply satisfying about creating this tangy delight yourself.
*Milk is often added to sour cream to reduce its fat content resulting in a tangier, stronger flavor.
Note: You can make a vegan sour cream with either coconut milk, nut milk, or non-dairy yogurt.
Health Benefits of Homemade Sour Cream
Sour cream, especially when homemade, can provide a variety of benefits to your gut health:
Probiotics: The fermentation process introduces live probiotics or beneficial bacteria into the cream.
Digestive Enzymes: The fermentation process also produces enzymes that can help break down food more efficiently.
Lactose Digestion: The lactic acid bacteria in sour cream help break down lactose, which can make it easier to digest for individuals who are lactose intolerant.
Note: If you are intolerant to dairy products, you might be able to tolerate naturally-cultured sour cream. However, you would be better off starting with homemade kefir to first improve your gut microbiome.
Ingredients and Equipment Needed
For homemade sour cream, you’ll need just a few simple ingredients:
1 cup (250 ml) cream. Look for pasteurized, as opposed to ultra-pasteurized, heavy cream. For best results, make sure the cream has a high-fat content, typically around 20% or more. The cream I use lists 36% m.f. (milk fat). Crème fraîche is usually made with 30% milk fat.
Check the “sell-by” dates to get cream that is as fresh as possible. Once the cream is bottled, it will start to sour (putrefy) with errant bacteria in the environment—not necessarily the microbes you want to cultivate.
2-3 tablespoon(s) culture. Just about any sour cream can be used. The fewer ingredients on the label, the better. You only use store-bought sour cream for your first culture.
Note: After I make a few more batches, I’ll update this recipe with the actual weight of the culture used. Currently, I have 50-gram jars of cultured stashed in my freezer.
I love Bellwether Farms Crème Fraîche, which contains only cultured cream. Available at Costco (according to an internet search) and Whole Foods.
You can also use buttermilk or a specific sour cream culture.
As for equipment, you need a clean glass jar with a lid, a mixing spoon, and a kitchen thermometer. A like to use a pint (500 ml) jar with the lovely shape and size of this Weck jar being my designated sour cream container. A quart (liter) is too deep.
Simple Steps to Making Your Own Sour Cream
- First, in your glass jar, make a slurry by combining your culture with just a few spoonfuls of heavy cream. Mix well. By first creating a slurry, you’re able to ensure that the culture is thoroughly mixed in with the cream.
- Gradually add in the remaining heavy cream, thoroughly mixing as you go. Leave 1-2 inches (3-5 cm) of headspace.
- Screw on the lid and allow to rest at room temperature until thickened to desired texture, about 12-24 hours.
- Stir contents and taste. If it needs more souring, let it ferment another day or two, tasting along the way.
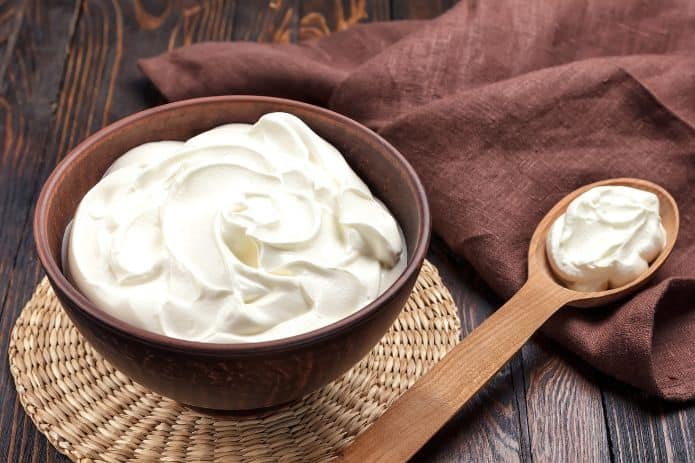
- Once you’re satisfied with the thickness and tanginess, store your homemade sour cream in a sealed container in your fridge. This stops the fermentation process and keeps your sour cream fresh. It should keep for up to 2 weeks. It does thicken a tad more when in the fridge.
Typically it takes a day at room temperature, maybe longer if it’s cooler.
The ideal fermentation temperature is about 75°F (24°C).
Warmer temps will speed up fermentation and your sour cream will be done sooner.
Cooler temps will slow down fermentation and your sour cream will take longer to culture.
Adjust the batch size to how much you consume in a week or two.
Next Batch?
In preparation for making your next batch of sour cream, place 2-3 tablespoons of sour cream from the batch you just made into the freezer. When you’re ready to make a new batch, use this as your culture. No need to buy more sour cream (starter).
Defrost the frozen culture for 24 hours in the fridge before using it.
Remember that home fermentation is not an exact science (though, I try to give you the scientific foundation for success).
Fermentation results are affected by many variables including the time of the year, the temperature and humidity of your home, and even the amount of light in the kitchen.
Enjoy the journey of discovering what works best in your home!
Ideas for Using Your Homemade Sour Cream
Your homemade sour cream can elevate many dishes. Use it as a tangy topping for soups and baked potatoes, mix it into cake and muffin batters for extra moistness, or stir it into sauces for a creamy texture. Enjoy the versatility!
FAQs
Use pasteurized, as opposed to ultra-pasteurized, heavy cream with a high-fat content, typically around 20% or more.
Cultured buttermilk is a great alternative for making sour cream as the flavor is similar.
The ideal fermentation temperature is about 75°F (24°C).
Stored in a sealed container, sour cream should keep for up to 2 weeks
Sour cream can be made with coconut cream, nut milk, and dairy-free yogurt: Easy Peasy Dairy Free Sour Cream {Dairy, Soy, & Nut Free}
Yes, ferment your sour cream until it achieves the thickness desired.
If it doesn’t thicken within a few days, your culture may not be good, or the temperature in your home may be too cool.
If it smells off or moldy, toss it and restart with a new culture.
Yes, the beauty of homemade sour cream is that you can make batch after batch without having to buy a new starter.
Yes, lemon juice will “sour” your cream. However, it doesn’t “culture” or “ferment” it and contains none of the added bacteria from the culturing process.
Homemade Sour Cream
EQUIPMENT
- 1 Glass quart jar With a lid
- Mixing spoon
- Kitchen Thermometer
INGREDIENTS
- 1 cup cream, 250 ml
- 2-3 tbsp culture
INSTRUCTIONS
- MAKE SLURRY.First, in your glass jar, make a slurry by combining your culture with just a few spoonfuls of heavy cream. Mix well. By first creating a slurry, you’re able to ensure that the culture is thoroughly mixed in with the cream.
- ADD IN CREAM.Gradually add in the remaining heavy cream, thoroughly mixing as you go. Leave 1-2 inches (3-5 cm) of headspace.
- CULTURE. (FERMENT).Screw on the lid and allow to rest at room temperature until thickened to desired texture, about 12-24 hours.
- TASTE.Stir contents and taste. If it needs more souring, let it ferment another day or two, tasting along the way.
- STORE.Once you're satisfied with the thickness and tanginess, store your homemade sour cream in a sealed container in your fridge. This stops the fermentation process and keeps your sour cream fresh. It should keep for up to 2 weeks. It does thicken a tad more when in the fridge.
Notes and Tips
- Look for pasteurized, as opposed to ultra-pasteurized, heavy cream. For best results, make sure the cream has a high-fat content, typically around 20% or more. The cream I use lists 36% m.f. (milk fat). Crème fraîche is usually made with 30% milk fat.
- Just about any sour cream can be used. The fewer ingredients on the label, the better. You only use store-bought sour cream for your first culture.
I love Bellwether Farms Crème Fraîche, which contains only cultured cream. Available at Costco (according to an internet search) and Whole Foods. - The ideal fermentation temperature is about 75°F (24°C).
- Next Batch? In preparation for making your next batch of sour cream, place 2-3 tablespoons of sour cream from the batch you just made into the freezer. When you’re ready to make a new batch, use this as your culture. No need to buy more sour cream (starter).

Hello 🙂 thank you for all your amazing content! Is it ok to use a very good quality plain yoghurt as my culture? I’ve made it a few times with this method and it seems to thicken up nicely and tastes amazing, I wonder if it’s the right thing to do though.
Yes, each different culture you use (in your case, yogurt) will give a different flavor to your sour cream. Kefir and buttermilk also work.