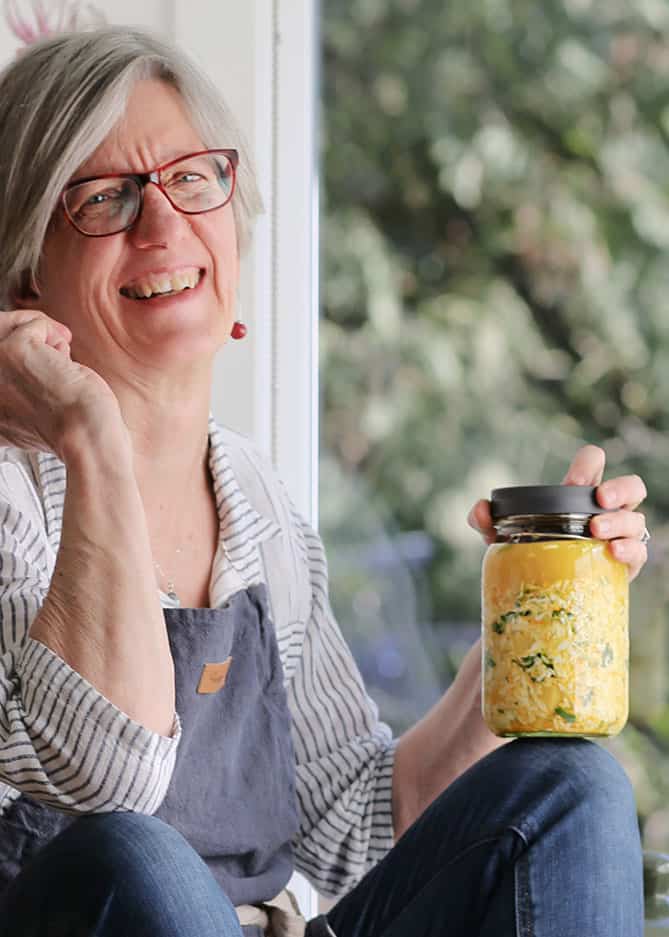

 This post may contain affiliate links which won’t change your price but will share some commission.
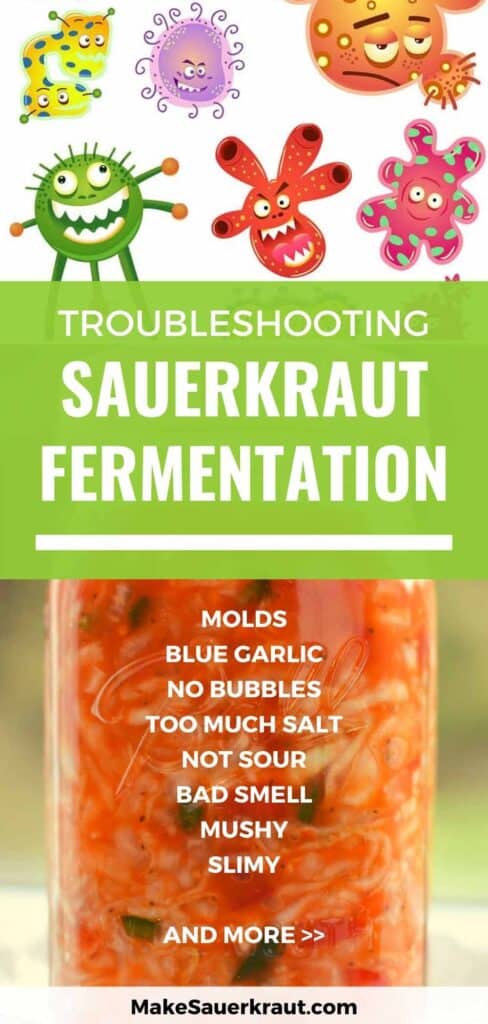
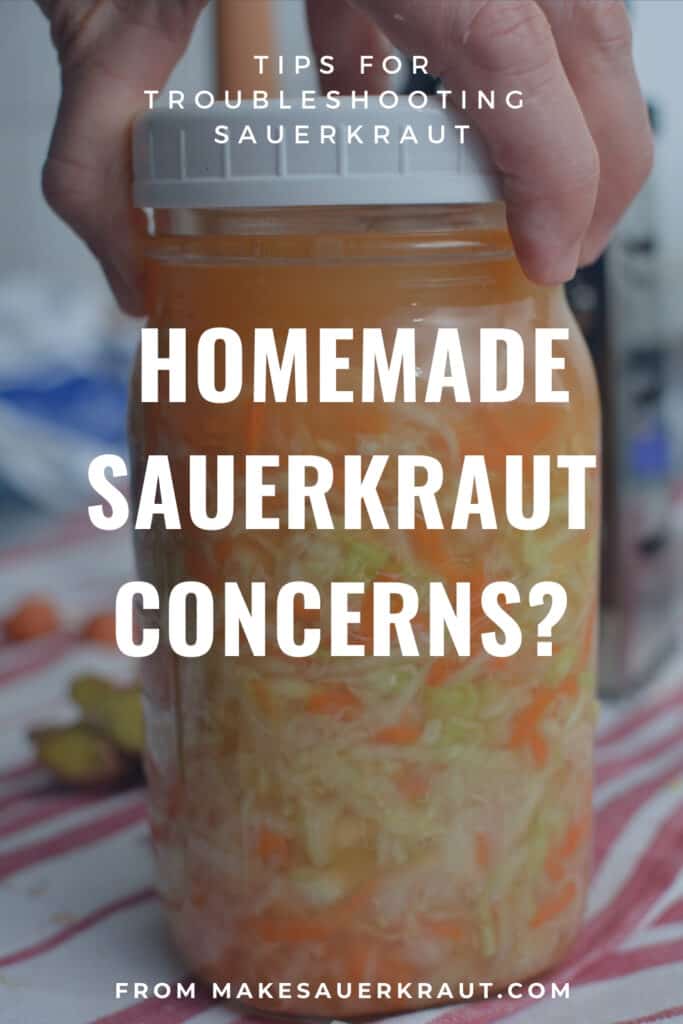
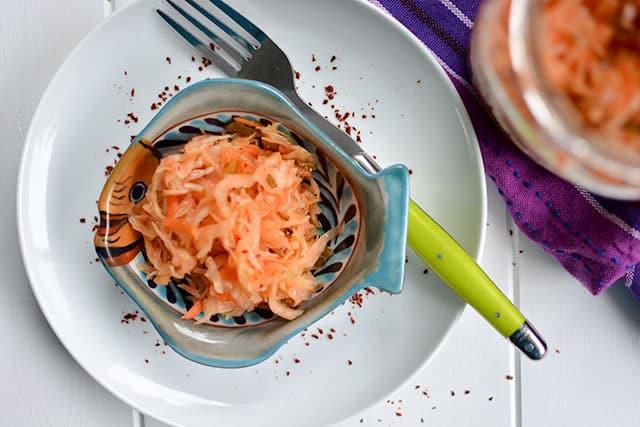
Are there uninvited guests lurking in your jar of sauerkraut? Most likely not.
It can be very unnerving to leave a jar of vegetables on your counter to ferment for weeks on end. It is even more disquieting to find mold growing, pink splotches – Are they from outer space? – or to get a pungent whiff of some god-awful smell when opening your jar of fermenting sauerkraut.
Do you fear that your fermentation has gone bad and you will poison your family?
In the case of fermented vegetables, such fear is unfounded.
As far as I know, there has never been a documented case of food-borne illness from fermented vegetables. Risky is not a word I would use to describe vegetable fermentation. It is one of the oldest and safest technologies we have. – Fred Breidt, microbiologist, US Department of Agriculture
– Fred Breidt, microbiologist, US Department of Agriculture
But, you ask!
What are those nasties growing on my sauerkraut?
Why do I not see any bubbles? Does that mean fermentation is not happening?
Or, my sauerkraut is too mushy. What caused that?
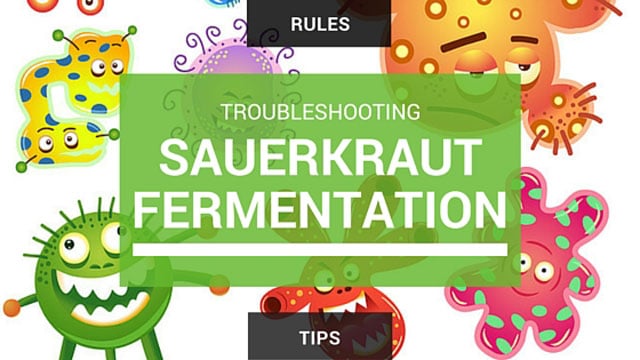
5-Senses Check for Safe & Scrumptious Sauerkraut
Use the button below to get your own printable “5-Senses Check” PDF.
Three Basic Fermentation Rules
Keep these basic rules in mind as you learn this time-honored skill of preserving foods. Have fun along the way.
Basic Fermentation Rules
- Keep it Salty! Weigh your cabbage and vegetables to ensure you add the correct amount of salt to create a 2% brine.
The correct numbers are 1 tablespoon (16 grams) of salt for 1 3/4 pound (800 grams) vegetables OR 3 tablespoons of salt for 5 pounds vegetables. Remember, these weights include not just the cabbage, but any vegetables and seasonings you’re mixing with the cabbage. - Keep it Under the Brine! Use some type of weight to keep fermenting cabbage and vegetables submerged, especially during the first 7-10 days when the microbial climate of your jar is established.
Put on a lid to keep out the air! Fermenting is an anaerobic process. - Keep it at the Ideal Temperatures! This is especially important during the first few days of fermentation when the lactic acid bacteria are creating the lactic acid necessary to preserve your sauerkraut. If your kitchen is too warm or too cold, look around for a better spot. A temperature range of 65-70°F (18-21°C) degrees is ideal.
Want to make sure nothing goes wrong with your sauerkraut fermentation? Visit my recipe How to Make Sauerkraut in a Jar in 7 Simple Steps [Healthy, Flavorful, Easy] for numerous tips and step-by-step instructions with plenty of photos.
I’ve broken my troubleshooting tips into broad categories to help you figure out what is happening in your jar or fermentation crock. It is rare that you will find a situation where your sauerkraut needs to be tossed. Usually, what you are seeing is normal and can be fine-tuned by adjusting the temperature at which you’re fermenting and how long you’re fermenting.
I’ve included some images from the Comments section where readers have uploaded their pictures of moldy, slimy, brown sauerkraut. Such pictures are worth a thousand words. 🙂
Things Growing on My Sauerkraut
The sudden invasion of green and black fuzzies or white powder on your precious ferment can be rather alarming prompting even the hardiest of us to toss it all and vow to never ferment again.
Please be patient and take the time to figure out what went wrong. Or, what went “right” to allow the mold or yeast to take hold. Molds and yeasts are rare if the basic rules for fermentation are followed.
Here is a helpful Facebook post with many great pictures to help you tell the difference between mold or yeast growing on your ferment.
Kahm Yeast

Kahm can describe a number of yeasts that will sometimes show up on the surface of a ferment that hasn’t reached a high enough acidity.
Kahm yeast is a flat, thin, white to cream-colored powder and if it grows thick enough, it can almost look like velvet. The yeast can also appear as a creamy scum if it forms and then the brine level drops below the surface.
You may see Kahm yeast raised from the surface of your brine if air bubbles get trapped by the Kahm yeast layer.
Kahm yeast takes hold at the beginning of fermentation if the required high acidity level of your ferment is slow to form. It appears most often during warm weather and when fermenting sweeter vegetables, such as beets, carrots, and peppers. Its growth is often an indicator that not enough salt was used.
It can look scary and unpleasant and even smell a little strong, ranging from yeasty to cheesy or even reminiscent of alcohol. Although harmless, Kahm yeast is something you don’t want to let overgrow since it affects the flavor of what you are fermenting.
Tips to Avoid Annoying, Powdery Yeast
- Ferment at cooler temperatures. This is especially important during the first few days of fermentation when the lactic acid bacteria are creating the lactic acid necessary to preserve your sauerkraut. Look around your home for a cooler spot or ferment during a cooler season. A temperature range of 65-70°F (18-21°C) degrees is best.
- Use sufficient salt. It can be a good idea to increase the amount of salt you use when fermenting at temperatures that are higher than ideal. Use a heaping tablespoon instead of a level tablespoon, or 2.5%, if weighing your salt.
- Give the lactic acid bacteria easy access to the sugars in your vegetables. A fast rise of acidity levels in your jar reduces the chance that Kahm yeast will take hold. Acid levels rise as the bacteria consume the naturally occurring sugars in your cabbage and vegetables, sugars that are locked inside the cells of your vegetables. By thinly slicing your cabbage, you make it easier for the bacteria to get at those sugars. Pull out that mandolin!
- Keep your ferment submerged and sealed. Since yeasts are airborne and can only grow where there is air, be sure to submerge your ferment below the brine and use a lid on your fermentation vessel. Doing so helps to stack the deck in your favor, but even the best of us have had yeasts grow in a sealed jar.
- Reduce the amount of sweet vegetables used. The sugars in ferments that include sweets vegetables set the stage for yeasts to take hold. If you’re fermenting during the heat of summer, you might want to refrain from using carrots, beets, or sweet peppers in this particular batch of sauerkraut. Or instead, reduce the length of time that you ferment high-sugar ferments.
A few years back, I tossed a jar of sauerkraut that had strange creamy-white threads of who-knows-what working their way along the top layers. I now know it was Kahm yeast with a strong alcohol smell to it. Too far along to even consider eating. Read about it here.
What to Do If You Have Kahm Yeast Growing on Your Ferment
Due to its powdery nature, it can be hard to remove, and once it has invaded your jar, it tends to reappear after removal, even when stored in your refrigerator. To make removal easier, wait until fermentation is complete – or even cut it short – remove all of the yeast, including what is stuck in the jar, and then taste the top layer. If it tastes of Kahm yeast, remove it until you get down to a section that tastes fine. Then, repack your sauerkraut into a clean jar.
This is a time to thoroughly clean your jar, crock, lid or whatever came in contact with this batch of sauerkraut, perhaps using a distilled white vinegar solution.
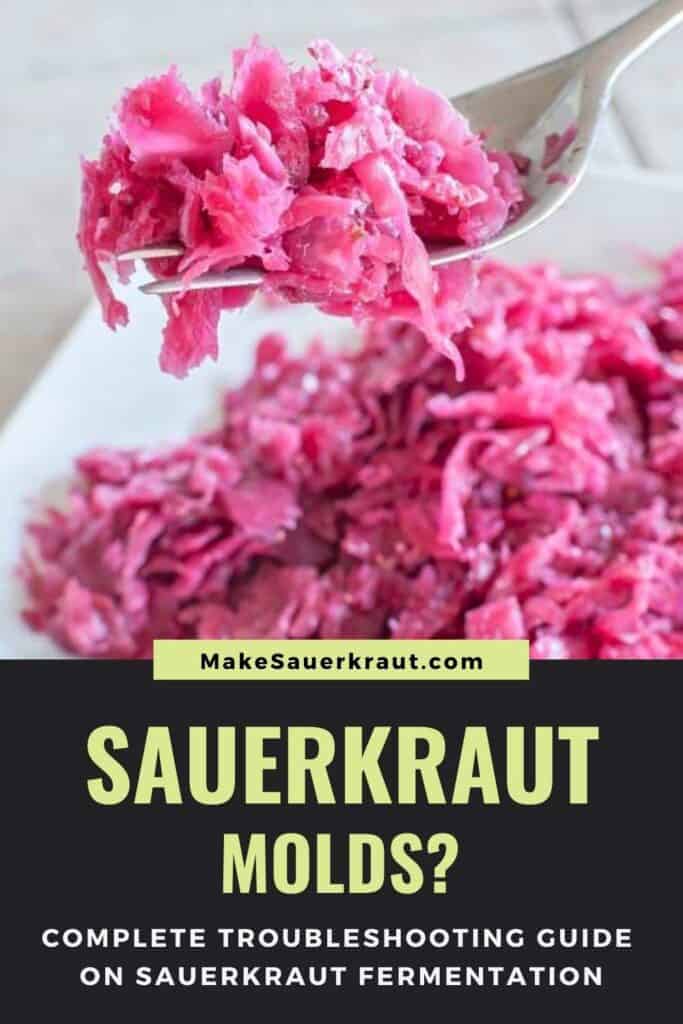
Mold
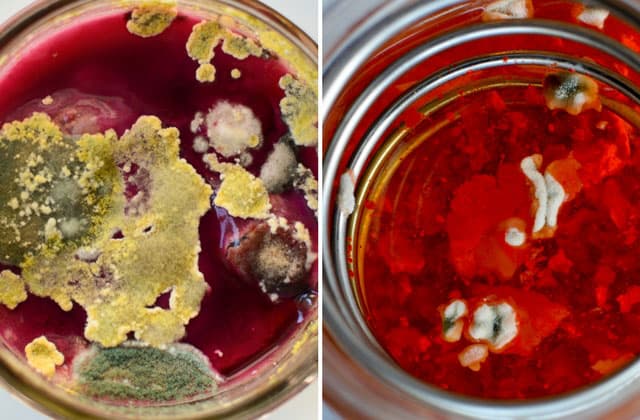
Mold is raised and fuzzy and can be white, black, blue, green or even pink. Mold grows from mold spores that are present everywhere in the air and on the surface of fruits and vegetables.
Mold begins growing when spores land – or already exist – on a wet nutrient-rich surface, such as bits of exposed cabbage, and over time grows into a thick layer. They can actually survive in acidic foods so it’s not necessarily the acidity that deters them. But don’t grab your bleach bottle and try and sterilize your jar and lid trying to kill these mold spores. You’ll be killing off the bacteria just the bacteria you need.
All bacteria and fungi produce what are called, in scientific terminology, ‘competitive factors.’ Lactobacillus produces lactic acid and hydrogen peroxide that is lethal to mold spores. The faster the Lactobacillus takes hold, the less likely you’ll have mold. And a perfectly sterile environment is not good for the bacteria, just like it’s not good for the mold. – Wild Fermentation Forum
Another blogger has more on mold in ferments with lots of pictures here.
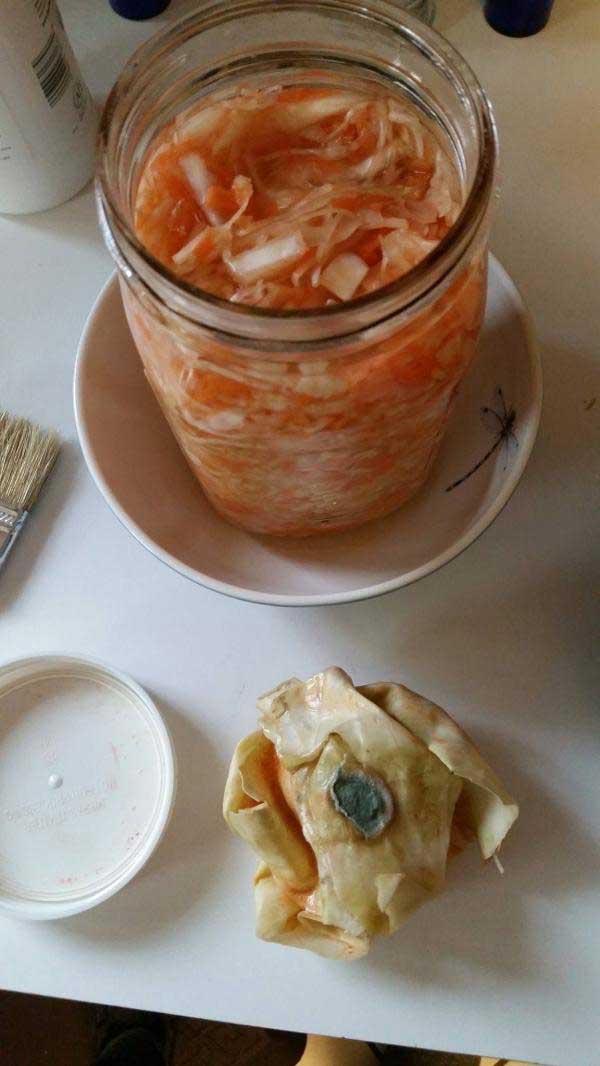
This picture from one of my readers shows some mold. Their cabbage floaties trap was out of the brine and exposed to air and mold grew. Toss the offending piece. The rest is fine.
First off, rarely should you have mold growing on your ferment. If you do, don’t get mad and think you will never figure out fermentation. Instead, treat the mold as a big Thank You! from the mold spores. You established the perfect home for them to grow: air, warmth, and not enough little salt.
Figure out exactly why the mold grew and adjust the next batch accordingly.
Tips to Prevent the Dreaded Mold
- Use clean equipment. Clean does not mean sterile. The trick is to provide a fermentation environment where good bacteria can quickly out-compete the bad bacteria. Sanitizing things is overkill and destroys the bacteria necessary for establishing the proper fermentation environment. Simply clean your jars and equipment with gentle dish soap and rinse well with water.
- Pack jar 75-80% full. Too much air in your jar can lead to mold and yeast growth since it may take a while for the production of gases by the bacteria. These CO2 gases force oxygen out of the jar. Add more cabbage or move it to a smaller jar.
- Ferment at cooler temperatures. This is especially important during the first few days of fermentation when the lactic acid bacteria are creating the lactic acid necessary to preserve your sauerkraut. Look around your home for a cooler spot or ferment during a cooler season. A temperature range of 65-70°F (18-21°C) degrees is best.
- Use sufficient salt. If you’re fermenting at temperatures that are higher than ideal, increase the amount of salt you use. Use a heaping tablespoon instead of a level tablespoon, or 2.5%, if weighing your salt.
- Create an anaerobic environment. Mold needs air to grow. By keeping your ferment below the brine and using an airlock of some type, mold can’t get to your ferment.
- Use fresh, top-quality ingredients. Vegetables that are starting to go bad have a higher mold content than fresh vegetables. Give a competitive advantage to the good bacteria and use super-fresh vegetables
Should You Salvage a Moldy Ferment or Be Safe and Toss It?
This is a personal question that you will have to answer. I’ll share my insights but leave the final decision up to you.
Mold spores are everywhere. We can’t eliminate them.
If the environment is right, mold spores will grow and multiply on the surface of your ferment. This is fairly common with open crock fermentation where the nutrient-rich surface of the ferment is in contact with oxygen-rich air. Usually, underneath the mold growth, your ferment is untouched and smells fresh and clean.
The few times I’ve made the decision to toss a jar of moldy sauerkraut, I have removed that top layer of nasty-looking stuff to unearth wonderful, tangy, and fresh-smelling sauerkraut. I stop mid-toss as my hate-to-waste side kicked in and it was saved from the compost pile and enjoyed by the family.
Most find it perfectly safe to remove the layer of mold on top of their ferment. This is fine with greenish or grayish mold. However, toss ferments with black, pink, or orange mold or if they have an off smell.
If you are not comfortable salvaging a ferment or are sensitive to molds, by all means, throw it all out!
How to Salvage a Ferment that has Mold
Remove mold or other surface growth, as best you can as soon as you see it. The longer you allow the mold to grow, the deeper it penetrates your ferment. Molds can digest pectins, leading to mushy vegetables. Molds also digest lactic acid, the crucial preservative in your ferment.
Gently remove your weight from your fermentation vessel, then use a large spoon to get under the mold and skim it off the best you can. Evaluate the texture of the underlying ferment, removing any layers that are soft or discolored. If you have pH strips, test your ferment, looking for a pH reading below 4.0.
Since mold needs lots of oxygen to grow, it doesn’t hurt to then stir the brine layer a bit to submerge any microscopic mold spores you may have missed, thus depriving those microscopic beings of the oxygen they need for survival.
A Watch Pot Never Bubbles: Bubble Issues
During the first few days of fermentation, you should see little champagne-like bubbles slowly moving through the sauerkraut and rising to the surface.
These bubbles are most predominate during the initial few days when the first bacterial strain to go to work (L. mesenteroides) are eating the sugars in your cabbage and vegetables. This produces carbon dioxide, hence the bubbles. Their work also increases the acidity of the brine. You may hear an occasional fizzy sound as the bubbles work their way out of your jar, either through your loose lid or an airlock.
Though this is one of the key fermentation signs, don’t panic and toss your jar if you don’t see bubbles. They can be elusive and not every batch of sauerkraut progresses through each stage with perfect timing. You are not fermenting in a climate-controlled laboratory!
Help! No Bubbles! My Ferment had Died
Keep Calm!
The bubbles are most likely in your jar but you can’t see them because they are trapped in the packed fermentation mixture. Remember, if it is past the first 5-7 days, you may no longer see many bubbles, if any.
Tips if You Don’t See Bubbles
- Release trapped bubbles. To reassure yourself that fermentation is progressing, try a few solid taps on the outside of the jar. You should see some bubbles begin to move up the sides of your jar
- Find a warmer spot. If your home is especially cool, fermentation will unfold slowly and bubble production will be reduced. Be patient or move your jar to a warmer spot. A temperature range of 65-70°F (18-21°C) degrees is best.
- Check your cabbage source. The amount of bubbles you see depends somewhat on the sugar levels in your cabbage, which can vary quite a bit depending upon variety and growing conditions. Nutritional data shows that the sugar content in 5 types of raw cabbage ranged from 1.18 grams to 3.83 grams per 100 grams. Cabbage low in sugar provides less food for the bacteria to eat and results in reduced production of carbon dioxide, those elusive bubbles. You won’t be able to test your cabbage for sugar levels, but if you’re concerned about an inactive batch, try buying your cabbage from another source. Cabbage that has been irradiated to increase its shelf life is devoid of microbial life, the very microbes necessary for fermentation. To avoid this issue, purchase organic cabbage.
- Look for other signs of fermentation. Cabbage turning from bright green to dull yellow, a cloudy brine or a sour taste to your ferment are all indicators that fermentation is unfolding as intended.
There is a Growing Foam-Like Mass of Bubbles Creeping Out of My Jar
With some batches of sauerkraut (usually those exceptionally high in natural sugars), you may see a foam-like mass of bubbles collecting on the surface of your ferment. The bubbles may even be colored depending on what you used to flavor your sauerkraut. Beets will leave a dark-red to brownish scum of bubbles.
Tips for Dealing with a Foaming Mass of Bubbles
- Keep your jar in a bowl. To catch an overflowing mass of brine and bubbles, be sure to place your jar of fermenting sauerkraut in a shallow bowl or tray.
- Skim off foam. Skim any persistent foam off the surface and discard. Foaming slows down quite quickly and usually stops by the end of the first week.
- Reduce the amount of sweet vegetables used. A good rule of thumb for a balanced batch of sauerkraut is 25% flavoring ingredients and 75% cabbage, especially when including sweet ingredients: carrots, beets, sweet peppers, and corn. This not only prevents excess bubbles but also prevents the formation of a syrupy batch or the domination of yeasts common in an alcohol ferment.
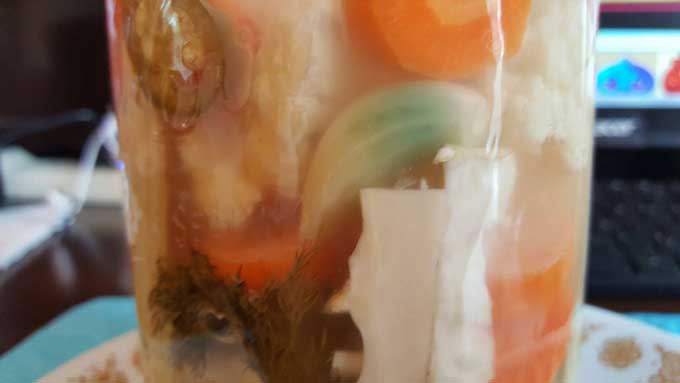
Brine Issues
Brine. That essential salty, nutrient-rich fluid keeps our ferment safe from airborne molds and yeasts. Sometimes, it is so copious that it flows out of the jar and onto our countertop. Other times, it just disappears and leaves our sauerkraut high and dry.
Help! I Have Too Much Brine. It is Spilling out the Top of My Sealed Jar
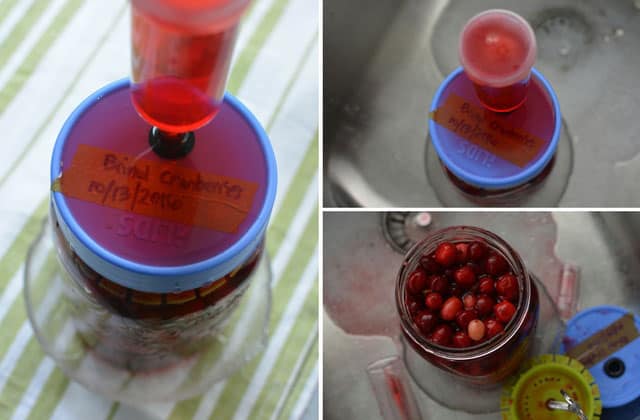
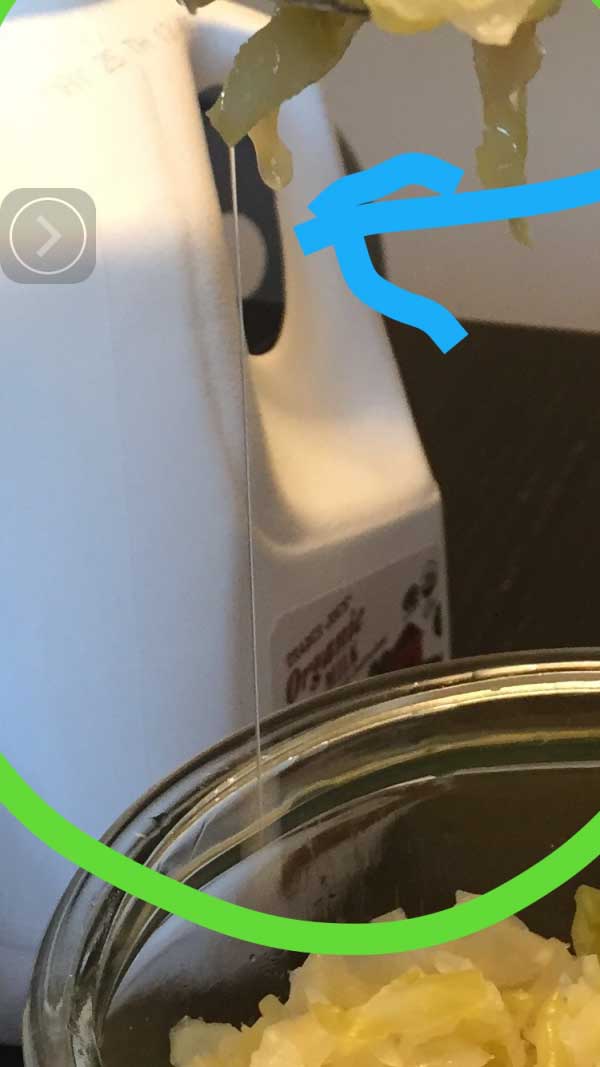
The first week of fermentation is when visibly your ferment is most active. Gases created during this first stage of fermentation need to push their way up and out of your packed sauerkraut. If these air bubbles instead get trapped in your packed sauerkraut, the mixture will expand and move up in the jar. This is called “heaving” and results in either brine pushing up and out to make a puddle around the jar or brine trickling down into available air pockets to make the top of your sauerkraut looks dry.
The amount of brine produced in your fermenting sauerkraut can vary dramatically from one batch to the next. Generally, you’ll have more brine at the beginning of fermentation and during the part of the day when your house is warmer. Ideally, you do not want to lose this precious brine. It helps to keep your ferment anaerobic and provides moisture in your jar of finished sauerkraut.
Tips for Dealing with Brine Overflow
- Catch the Brine. Make sure your jar is sitting in a small dish to prevent excess brine from overflowing onto your countertop. Check your dish daily during the first week. Empty and toss brine as need be.
- Leave enough headspace in your Jar. Yes, it’s easy to overpack a jar – I sure did with those cranberries! trying to avoid wasting any of that precious space. Doing so usually ends in a messy disaster. Try to pack your jars about 75-80% full, leaving about 2 inches (5 cm) of space between the top of your packed sauerkraut and the top of your jar. This gives a place for the brine to go as your packed sauerkraut expands
- Release trapped air bubbles. To release these trapped bubbles, first, remove the lid, then either push down on the weight, slide a butter knife along the inside of the jar or poke the sauerkraut with a bamboo skewer. Doing so will release the air bubbles and allow the sauerkraut to condense back down into the jar and the brine to once again cover the top of it. If you no longer have enough brine to cover the top of your sauerkraut, go ahead and make a small batch of 2% brine.
- Use a Fermentation Weight that Takes Up Less Space. I still recommend a little jar as a “weight” to keep things simple for first-time fermenters. However, one of its drawbacks is that it uses up space that would be better left for the brine. This is where the weight and size of a glass Pickle Pebble weight come in handy, though I’m not convinced it is always heavy enough.
- Invest in a Fermentation Gate. “Fermentation Gate” is a term I’m using to describe something “locked” into the neck of your jar that can’t be moved by the force of the expanding sauerkraut mixture. The gate stays locked and your ferment then has to remain in place below the brine. Currently available examples of Fermentation Gates are the Pickle Helix, the Kraut Source Fermentation Lid, ViscoDisc Canning Buddies and the Pickle Pusher also shown on my Fermenting Supplies page, which is kept up-to-date with the latest gizmos.
- Enjoy free entertainment. Watch the bubbling action and enjoy and observe how the brine falls and rises with temperature in your home.
Cloudy Brine
Cloudy brine is perfectly normal and actually a sign that fermentation is progressing. You may also notice some white sediment forming at the bottom of the jar. This white powder is from the bacteria and is perfectly normal. Some say it is caused by dead cell walls from the vegetables floating around. Others say it is from iodine or anti-caking agents found in some salts.
If your sauerkraut contains beets, turmeric or other deeply colored vegetables, you may see the brine change to match the color of what you are fermenting. You may also notice dirty specks of color – especially when using carrots or beets – forming at the top of your jar. All is good.
It is fine to consume cloudy brine; it is loaded with B-vitamins.
Brown Brine

This picture from one of my readers shows some brown brine.
When fermenting during warm weather, you may notice that your brine turns brown. Harmless but rather unappetizing. Try to cool things down with one of these tips.
Slimy Brine
This picture from one of my readers shows some slimy brine.
The first time slime found its way into one of my jars of fermenting goodness was with the popular Ginger Carrots recipe in Sally Fallon’s book Nourishing Traditions. Many of us have had a similar experience. We’re lured in by the opening of the recipe: “These are the best introduction to lacto-fermented vegetables we know.”
The high sugar content of the carrots invites unwanted microorganisms that prefer the high-sugar vegetables.
Sauerkraut with thick, stringy, slimy brine occasionally develops early on in the fermentation process due to the production of dextrans by rapidly growing strains of Lb. cucumeris and Lb. plantarium bacterium. Dextrans are high molecular weight polysaccharides made from glucose molecules, hence the slippery, syrupy brine.
This occurs especially at elevated temperatures or when fermenting vegetables high in sugars, like beets, carrots or sweet peppers.
Banish Slime with These Tips
- Ferment at cooler temperatures. This is especially important during the first few days of fermentation when the lactic acid bacteria are creating the lactic acid necessary to preserve your sauerkraut. Look around your home for a cooler spot or ferment during a cooler season. A temperature range of 65-70°F (18-21°C) degrees is best.
- Reduce the quantity of high-sugar vegetables. Since slimy brine is most common with high-sugar vegetables, keep them to a minimum especially if fermenting during elevated temperatures. Leave it to ferment longer, up to a month or move to the fridge for a few weeks. See: Which Vegetables and Seasonings Should I Use to Make Sauerkraut?
- Consider the use of a starter culture. If you live in a warm climate and are having repeated batches of sauerkraut with slimy brine, look into using a starter culture to ensure that the necessary strains of bacteria populate your ferment. I’m not a fan of using starter cultures, but I know some living in tropical countries have had success using them.
- Give the bacteria some time. Place in refrigerator for a few weeks to give the various bacteria a chance to rebalance.
- Add a 2% brine. If you’re fermenting just grated carrots, cover them in a 2% brine (1 tablespoon salt to 2 cups water) before fermenting.
- Shorten fermentation length. If your sauerkraut has more than the recommended amount of sweet vegetables or fruit, move to your refrigerator after just 10 days and leave there for a couple of months to finish fermenting.
Not Enough Brine
When you are massaging the salt into your cabbage you may notice that you have to work harder and longer to get a puddle of brine. The cabbages you used to make your sauerkraut could have dried out in storage. I have a whole post devoted to dry sauerkraut.
There are two times of the year cabbage is grown: spring and fall. In the spring, cabbage is ripening during longer, warmer days, which drys it out. In the fall, cabbage is ripening during shorter, coolers days which makes for sweet, densely packed heads.
Here are a Few Ways to Ensure you have Enough Brine
- Use fresh cabbage. Even though cabbage is approximately 92% water, if it is June and you’re about to make a batch of sauerkraut, that cabbage has most likely been in cold storage for 6 months and will have lost some of its moisture. Loss of moisture means less brine. The closer to harvest that you purchase your cabbage – and make sauerkraut – the more brine it will produce and the less chance of dry sauerkraut. When purchasing, select cabbages that seem heavy for their size and show tightly packed leaves when sliced open.
- Include watery vegetables. Grated radishes, carrots, beets, thinly sliced onions, or turnips will all give off a lot of liquid and help make copious brine.
- Add citrus juice. This tip comes from Kirsten and Christopher Shockey, authors of my favorite fermentation book: Fermented Vegetables. “A few tablespoons of lemon juice, bottled or fresh, can save the day. The lemon flavor will be subtle, as it gets lost in the acidity that you are creating with the fermentation. If you want to taste the lemon, add the zest also. You can also add fresh-squeezed orange, lime or grapefruit juice.”
- Slice Cabbage Thinner. Thin thread-like cuts of cabbage about ⅛ inch thick (2-3 mm) make for easy brine production along with overall improved quality of the finished product. Thread cuts expose more cabbage cells. More exposed cabbage cells release more fluid and more lactic-acid bacteria. More lactic-acid bacteria creates more lactic acid. Lactic acid helps to maintain a good pH which preserves flavor, texture, and color. What is the best way to get those thread cuts? A mandolin! Or, a food processor
- Ferment in a water-sealed fermentation crock. Sauerkraut fermented in the larger ceramic fermentation crocks tends to retain more brine.
Texture Issues
The texture of your finished ferment can range from melt-in-your-mouth soft to hurt-your-teeth hard with everything in between. Variations in batch occur throughout the year usually due to the temperature at which you are fermenting.
Sauerkraut that is Too Soft
If you prefer sauerkraut with a nice crunch, it can be heartbreaking to open up your jar to find mush.
Soft sauerkraut results when bacteria that normally do not initiate growth until the later stages of sauerkraut production actually grow earlier usually due to too high of fermentation temperatures or not enough salt. You can’t rescue the current batch but for future batches, adjust one or all the Salinity, Temperature and Time dials. See also How Long To Ferment Sauerkraut?.
Tips for Preventing Soft Sauerkraut
- Salinity. A higher salinity will slow down fermentation. Bump up your salt numbers just a tad. For a one quart (liter) batch, add a tad more salt: ½ teaspoon (4 grams).
- Temperature. Ferment at cooler temperatures. This is most crucial during the first week of fermentation. This makes it hard if you’re are fermenting during the summer. Sauerkraut is traditionally fermented during the fall when temperatures are cooler. See 11 Cool Fermentation Tips for Hot Weather
- Time. Ferment for a shorter time period. Sample your sauerkraut at the one-week mark and then every few days until it is at your preferred texture.
Sauerkraut that is Too Crunchy
To achieve a softer texture, adjust one or all the Salinity, Temperature and Time dials. See also How Long To Ferment Sauerkraut?.
Tips for Dealing with Sauerkraut that is Too Crunchy
- Salinity. Use a tad less salt for future batches. For a one quart (liter) batch, 2½ teaspoons (14 grams) total.
- Temperature. Ferment at warmer temperatures.
- Time. Ferment for a longer time period.
- Pound! When you are making your next batch and once you have mixed in your salt, spend some time actually pounding your cabbage mixture to break down the cabbage more than is possible by just “massaging the salted cabbage mixture with strong hands.” You’ll need a kraut pounder for this or you can use the end of a rolling pin, potato masher or similar device.
Flavor Issues
Be mindful of how your sauerkraut tastes and work with fermentation parameters until you get it right. Life is too short to eat blah sauerkraut!
Not Enough Tang
The sour flavor in sauerkraut comes from lactic acid produced by the lactic-acid bacteria (LAB) eating the sugars in your cabbage and vegetables. Once all the sugars have been converted to lactic acid, your max levels of tang have been reached.
Try These Tips for More Tang in Your Sauerkraut
- Time. If the cabbage you used wasn’t especially sweet you may not find your sauerkraut to be sour enough. Let it ferment a few days longer, then sample once again. If you don’t notice any increase in the tang, then sugars have been used up and this batch won’t get sourer.
- Provide more sugar for the LAB. For future batches under similar conditions, experiment with adding a touch of sugar to your ferment, say ½ teaspoon for a 1-quart jar, which will provide more food for the LAB to then create higher levels of lactic acid.
Too Salty
Sometimes too much salt gets mixed into our ferment, resulting in overly salty sauerkraut. Or, if you have been restricting your salt intake, sauerkraut may seem overly salty to you. Some sources say to rinse the sauerkraut. Doing so rinses off some, but not all of the beneficial probiotics. Personal preference along with the type of salt you used will play a factor in how salty your finished sauerkraut tastes.
Tips for Dealing with Salty Sauerkraut
- Use a mineral-rich salt. Himalayan Pink Salt and Redmond’s Real Salt are mineral-rich salts that contain a bit less sodium and impart a greater depth of flavor to foods than ordinary table salt does.
- Use a bit less salt. Decrease the percent of salt used down to 1.5%. (2 ½ teaspoons; 12 grams)
- Add a potato slice. I have not tried this, but culinary experts often add a raw potato slice to dishes that are too salty. In theory, it will act like a sponge, absorbing excess salt.
- Rinse. Just before eating, you can give your sauerkraut a quick rinse. This will wash off some but not all of the beneficial bacteria.
- Disperse the saltiness. Mix your sauerkraut into a salad or stir into a dish just before serving.
- Ferment longer. Sodium levels in sauerkraut are not changed by fermentation. However, as your sauerkraut ferments, acid levels rise that will mask the salty taste.
- Dehydrate. You can salvage a salty batch of sauerkraut by dehydrating it into a “Flavoring” Salt. I use my Kimchi-Flavoring salt in deviled eggs, pasta dishes and on sauteed greens. See the last tip on my 5 Ways to Store Fermented Sauerkraut [One is Controversial] post.
Color Concerns
As sauerkraut ferments, the bright green of the cabbage slowly fades to become almost pale white at the end of fermentation. This is normal. What if your sauerkraut turns pink? Brown?
Pink Sauerkraut
Pink sauerkraut can be quite beautiful and is great if it comes from red cabbage, beets red kale or even some fruits. But sometimes, pink color in sauerkraut is caused by pigments produced by the growth of certain types of yeasts. These yeasts may grow if there is too much salt, an uneven distribution of salt or if the kraut is insufficiently covered during fermentation. The yeasts that cause pink sauerkraut are not considered harmful and the sauerkraut is perfectly safe to eat.
Brown Sauerkraut
Over time, a jar of sauerkraut stored in your refrigerator will darken slightly. This is normal and perfectly fine to eat.
If instead, there is a brown layer of sauerkraut at the top of the jar, that portion of sauerkraut is oxidized. Air got to that section of sauerkraut and caused it to turn brown.
Since it is protecting the sauerkraut below, leave it alone, move your jar to the refrigerator and when you are ready to eat from the jar, remove and toss the oxidized layer.
Tips to Prevent Brown Sauerkraut
- Create an anaerobic environment. Use a fermentation weight and airlock to prevent air from getting into your ferment. Also, see these tips for dry sauerkraut.
- Invest in a Fermentation Gate. “Fermentation Gate” is a term I’m using to describe something “locked” into the neck of your jar that can’t be moved by the force of the expanding sauerkraut mixture. The gate stays locked and your ferment then has to remain in place below the brine. Currently available examples of Fermentation Gates are the Pickle Helix, the Kraut Source Fermentation Lid, ViscoDisc Canning Buddies and the Pickle Pusher also shown on my Fermenting Supplies page, which is kept up-to-date with the latest gizmos.
- Don’t introduce excess air. Wait at least until the end of the first week to sample your sauerkraut. By this time enough lactic acid has been produced and the pH has dropped sufficiently that introducing air into your ferment at this time should not cause oxidation.
Blue or Green Garlic
This image from one of my readers shows a clove of garlic that has turned a bluish green. Alarming!
In acidic conditions – fermenting – a compound found in garlic breaks down and reacts with amino acids to produce the blue-green color. Dramatic, but safe and no change in flavor.
Smell Issues
Funky old socks? Gym sweat? Farts? Rotten eggs? Stinky Swiss cheese? Sulfur? Even bleach! Those are a handful of the terms used to describe what fermenting sauerkraut can smell like. Thankfully, not every batch will produce these off-putting odors.
Natural Fermentation Odors
According to Kirsten and Christopher Shockey, authors of Fermented Vegetables – that I reviewed here, most of the stink periodically experienced in fermentation is caused by the production of naturally occurring fatty acids. For reasons unknown, some batches produce one or more of these acids in quantities that affect the smell.
Propionic acid is often described as smelling like human sweat or dirty socks or can also smell sulfurous like flatulence. Caproic acid smells like goats. Butyric acid smells like rancid butter. Isovaleric acid smells like a stinky locker room
Sulfur-containing compounds found in cabbage – and other cruciferous vegetables – can also produce strong and pungent odors.
Just remind yourself the numerous nutritional benefits they are packed with as your nose adjusts to the odors. Rest assured, however, your sauerkraut is still safe to consume.
Pungent Odors
If, however, your sauerkraut smells like rotting or putrid food, you’ll want to toss it. Putrid is an unmistakably awful odor that might even make your eyes water. Usually, molds, yeasts or an off-color accompany truly putrid-smelling sauerkraut.
What to Do When Overpowered by Smelly Sauerkraut
- Be patient. The strongest odors occur during the first few days when the various acids, are finding their way out of your jar. After that, odors will be less noticeable.
- Compare odors with some store-bought sauerkraut. If you are totally new to sauerkraut and not sure how if what you smell is putrid or normal, buy a jar of sauerkraut to get a sense of what sauerkraut smells like. Look for raw, unpasteurized sauerkraut in the refrigerated section of a natural foods store. Compare its smell to what you have fermenting and nibble on it while you wait for your sauerkraut to ferment.
- Trap odors. Keep a dish of baking soda next to your fermenting sauerkraut where it will absorb some of the odors.
- Relocate. Move your ferment to another room in the house – or even the garage – where it is out of the way, or even ventilated.
- Use water-sealed lids. Invest in water-sealed fermentation lids or a water-sealed fermentation crock that tend to trap most of the offensive odors.
Invaders: Fruit Flies and Maggots
If you are fermenting in an open crock or not able to put a lid on your jar of fermenting sauerkraut, both flies and fruit flies can find it and lay their eggs on the surface. The result? Maggots crawling out a few days later.
Though most prevalent during warmer months, fruit flies can be a problem all year-round. They are attracted to ripening fruit, fermented fruits, tomatoes, melons, squash, bananas, potatoes and onions. If I notice fruit flies, I set a few fruit-fly traps around my kitchen. I share two favorites, below.
Protecting Your Ferments from Things That Fly
- Lure them with apple cider vinegar bait. Pour a few ounces of apple cider vinegar into a shallow bowl. Plain vinegar does not work. Add a drop or two of dish soap. The vinegar attracts the flies and the soap reduces surface tension causing them to drown.
- Set a fruit trap. Place apple cores or other fruit bits into a small bowl and tightly cover with plastic wrap. Use a toothpick to poke a set of holes in the plastic. The fruit attracts the flies and they find their way into the bowl through the tiny holes but they can’t find their way back out. If you’re feeling kind, you can take the trap outdoors to release them.
- Protect your ferment. In the summer months when flies are most plentiful, It is imperative that you protect your ferment. Use a lid if fermenting in a jar. Or, if fermenting in an open crock, cover it with a finely woven cloth and tie a string around its edges to secure it.
Remove Infested Layer
If you do find maggots in your crock of sauerkraut, there is no need to panic or discard the whole batch.
As they hatch on the surface of a ferment, maggots migrate up and out of the food; they do not burrow farther down. Remove the top inch or so of the fermenting vegetables, and go as deep as necessary until you reach sauerkraut with no signs of maggots, no discoloration and a pleasant aroma. Be sure to wipe the interior sides of the vessel to remove any lingering maggots or eggs. – Sandor Katz, The Art of Fermentation
WOW! That should cover just about anything that could go wrong with your ferment. Let me know if I missed something.
5-Senses Check for Safe & Scrumptious Sauerkraut
Use the button below to get your own printable “5-Senses Check” PDF.
Remember the Basic Fermentation Rules
This should cover any imbalances you might encounter in your jars as you explore the wonderful and wild world of natural fermentation. Do not let them scare you away. Follow the basic rules of fermentation:
- Keep it Salty!
- Keep it Under the Brine!
- Keep it at the Ideal Temperature!
You will be successful! My recipe covers it all. Go give it a try and you might never need to visit this post again.
Last update on 2024-04-19 / Affiliate links / Images from Amazon Product Advertising API